Add questionnaire into app
The questionnaires enable you to create a structured set of questions to gather valuable health information from patients, supporting monitoring, assessment, and early diagnosis. This feature provides clinicians, patients, and caregivers with critical insights into a patient’s health status.
The ePROs widgets offer pre-made clinical questionnaires designed for various health purposes. The Huma ePROs have been approved by the licensors for use in digital health applications. It’s helpful to explore these options to see if one meets your needs before creating a custom questionnaire from scratch.
Create questionnaire from scratch
Adding a custom questionnaire into your app is straightforward:
- Navigate to the app builder: Open the Huma Studio within your platform and go to the screen where you want to add the questionnaire.
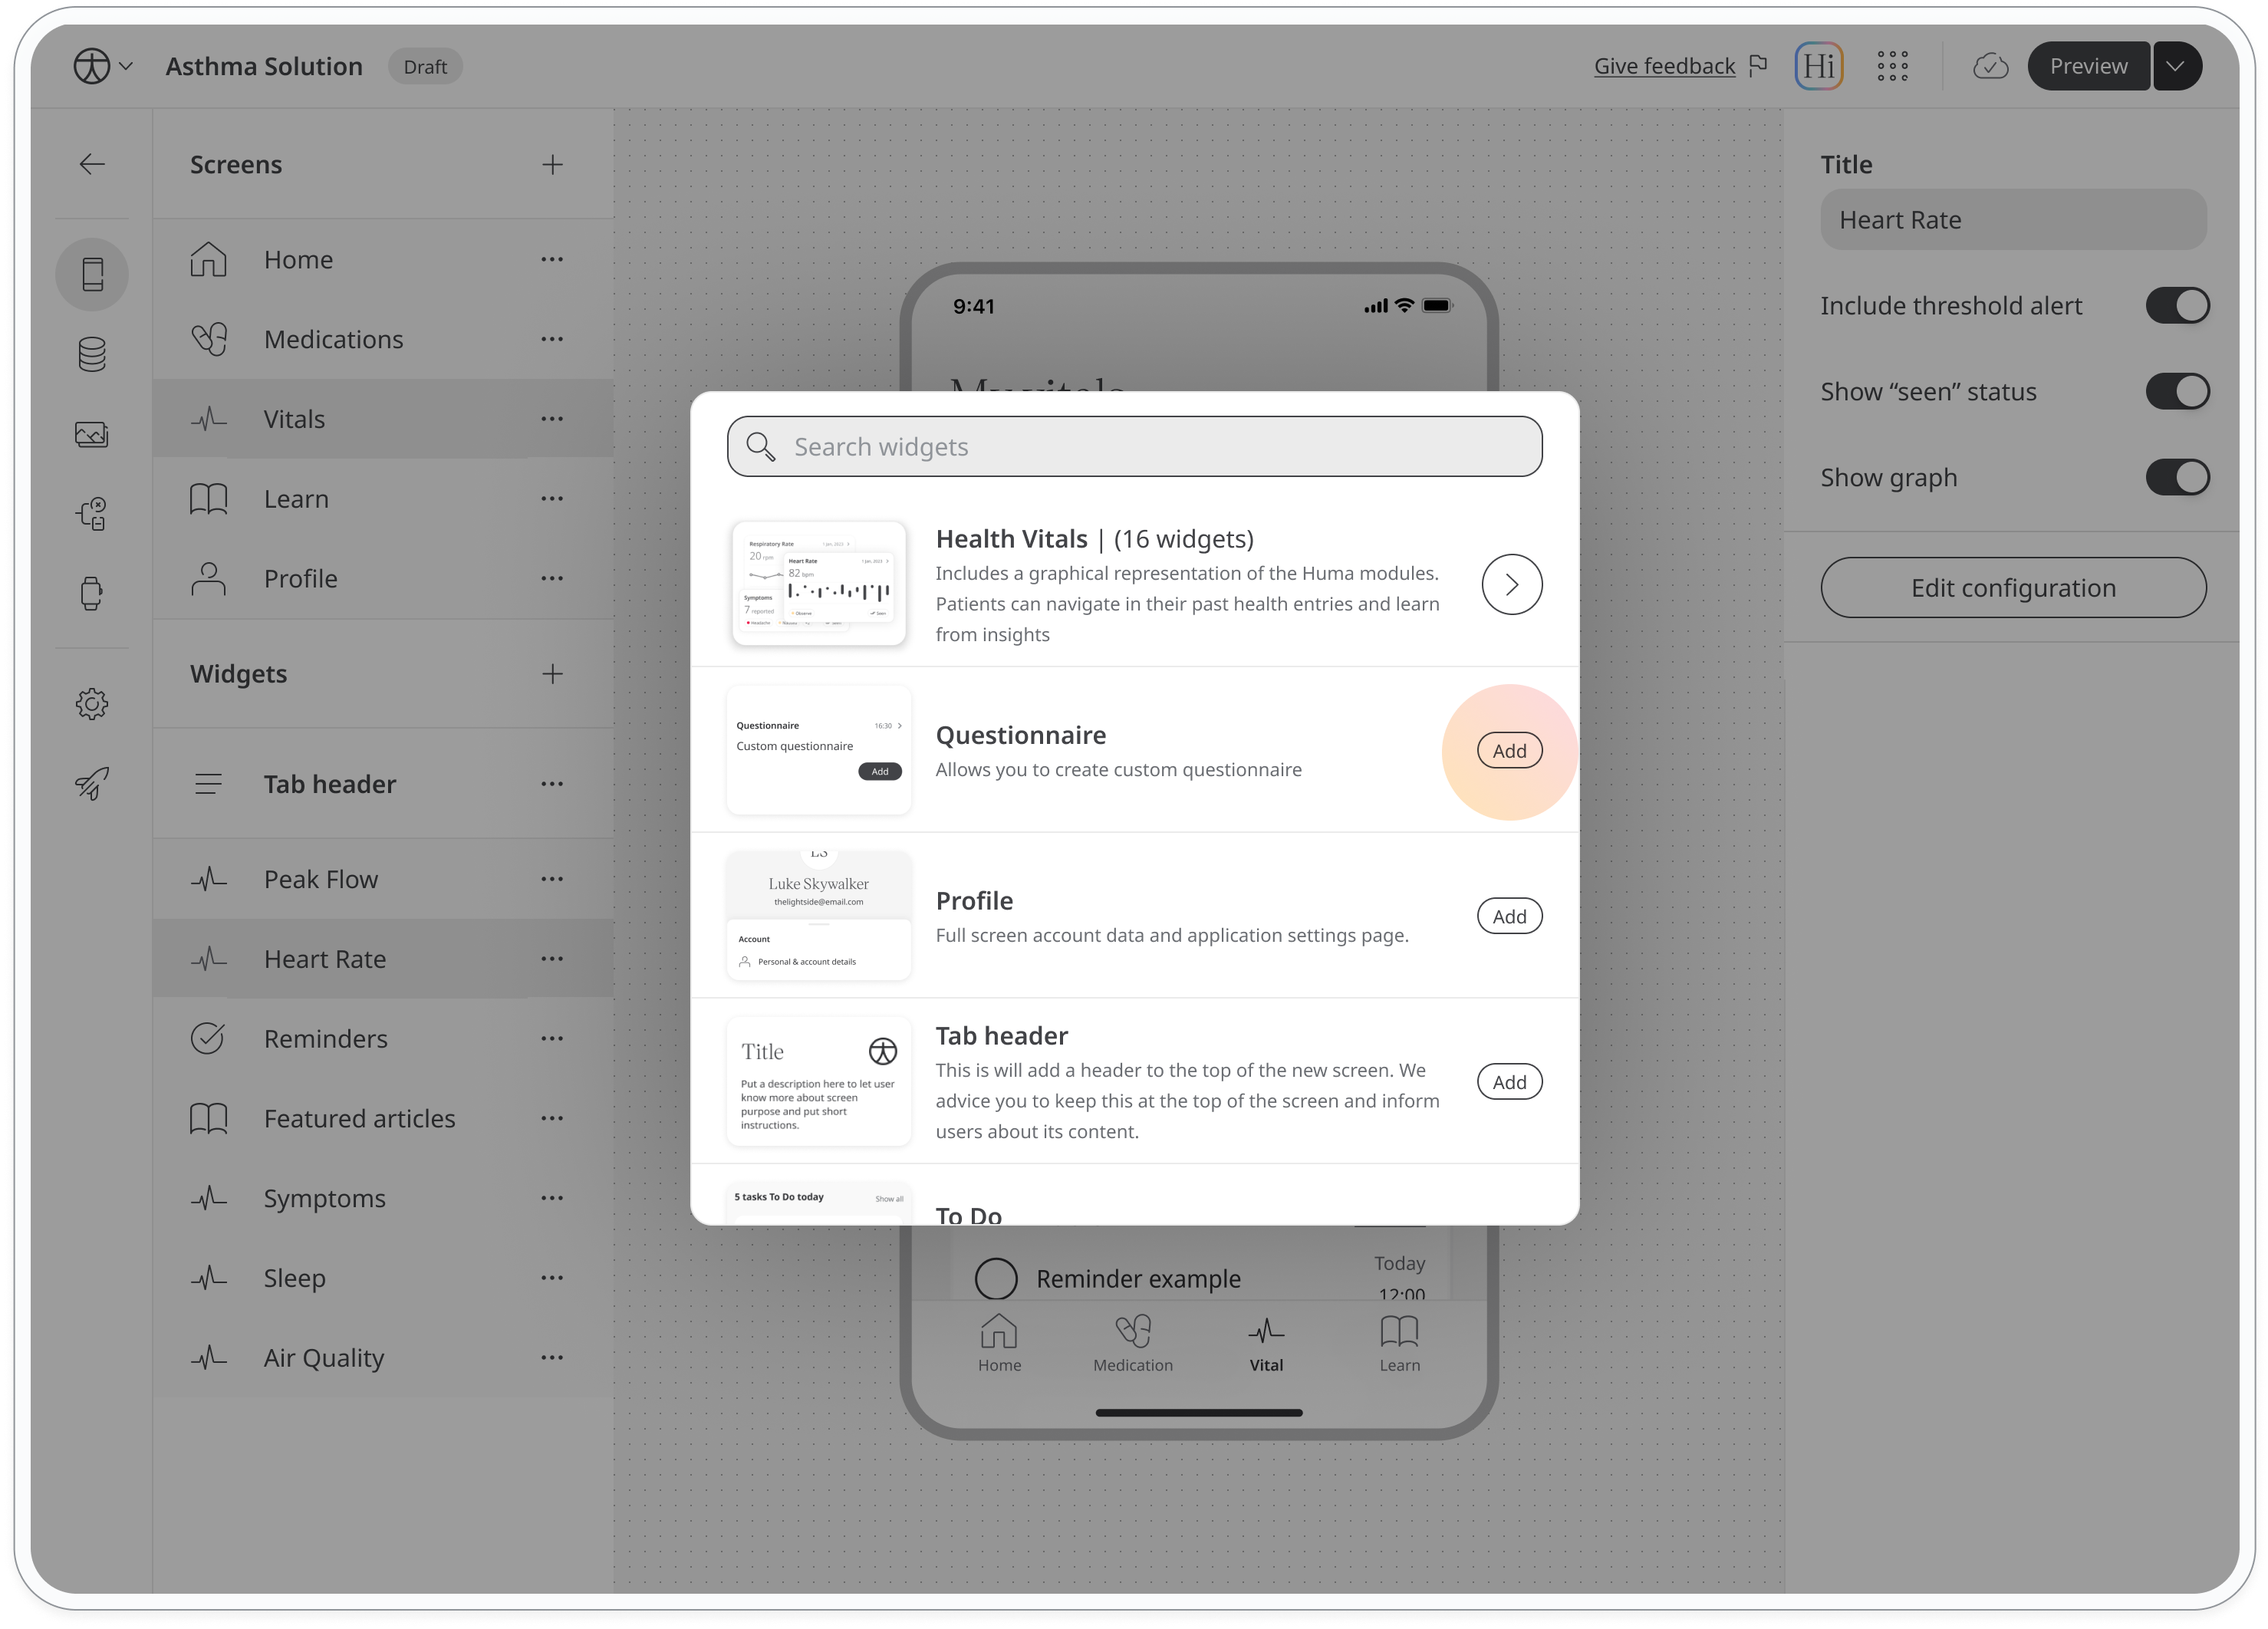
- Open the widgets menu: Click on the Widget + on the left sidebar to access the widget selection menu.
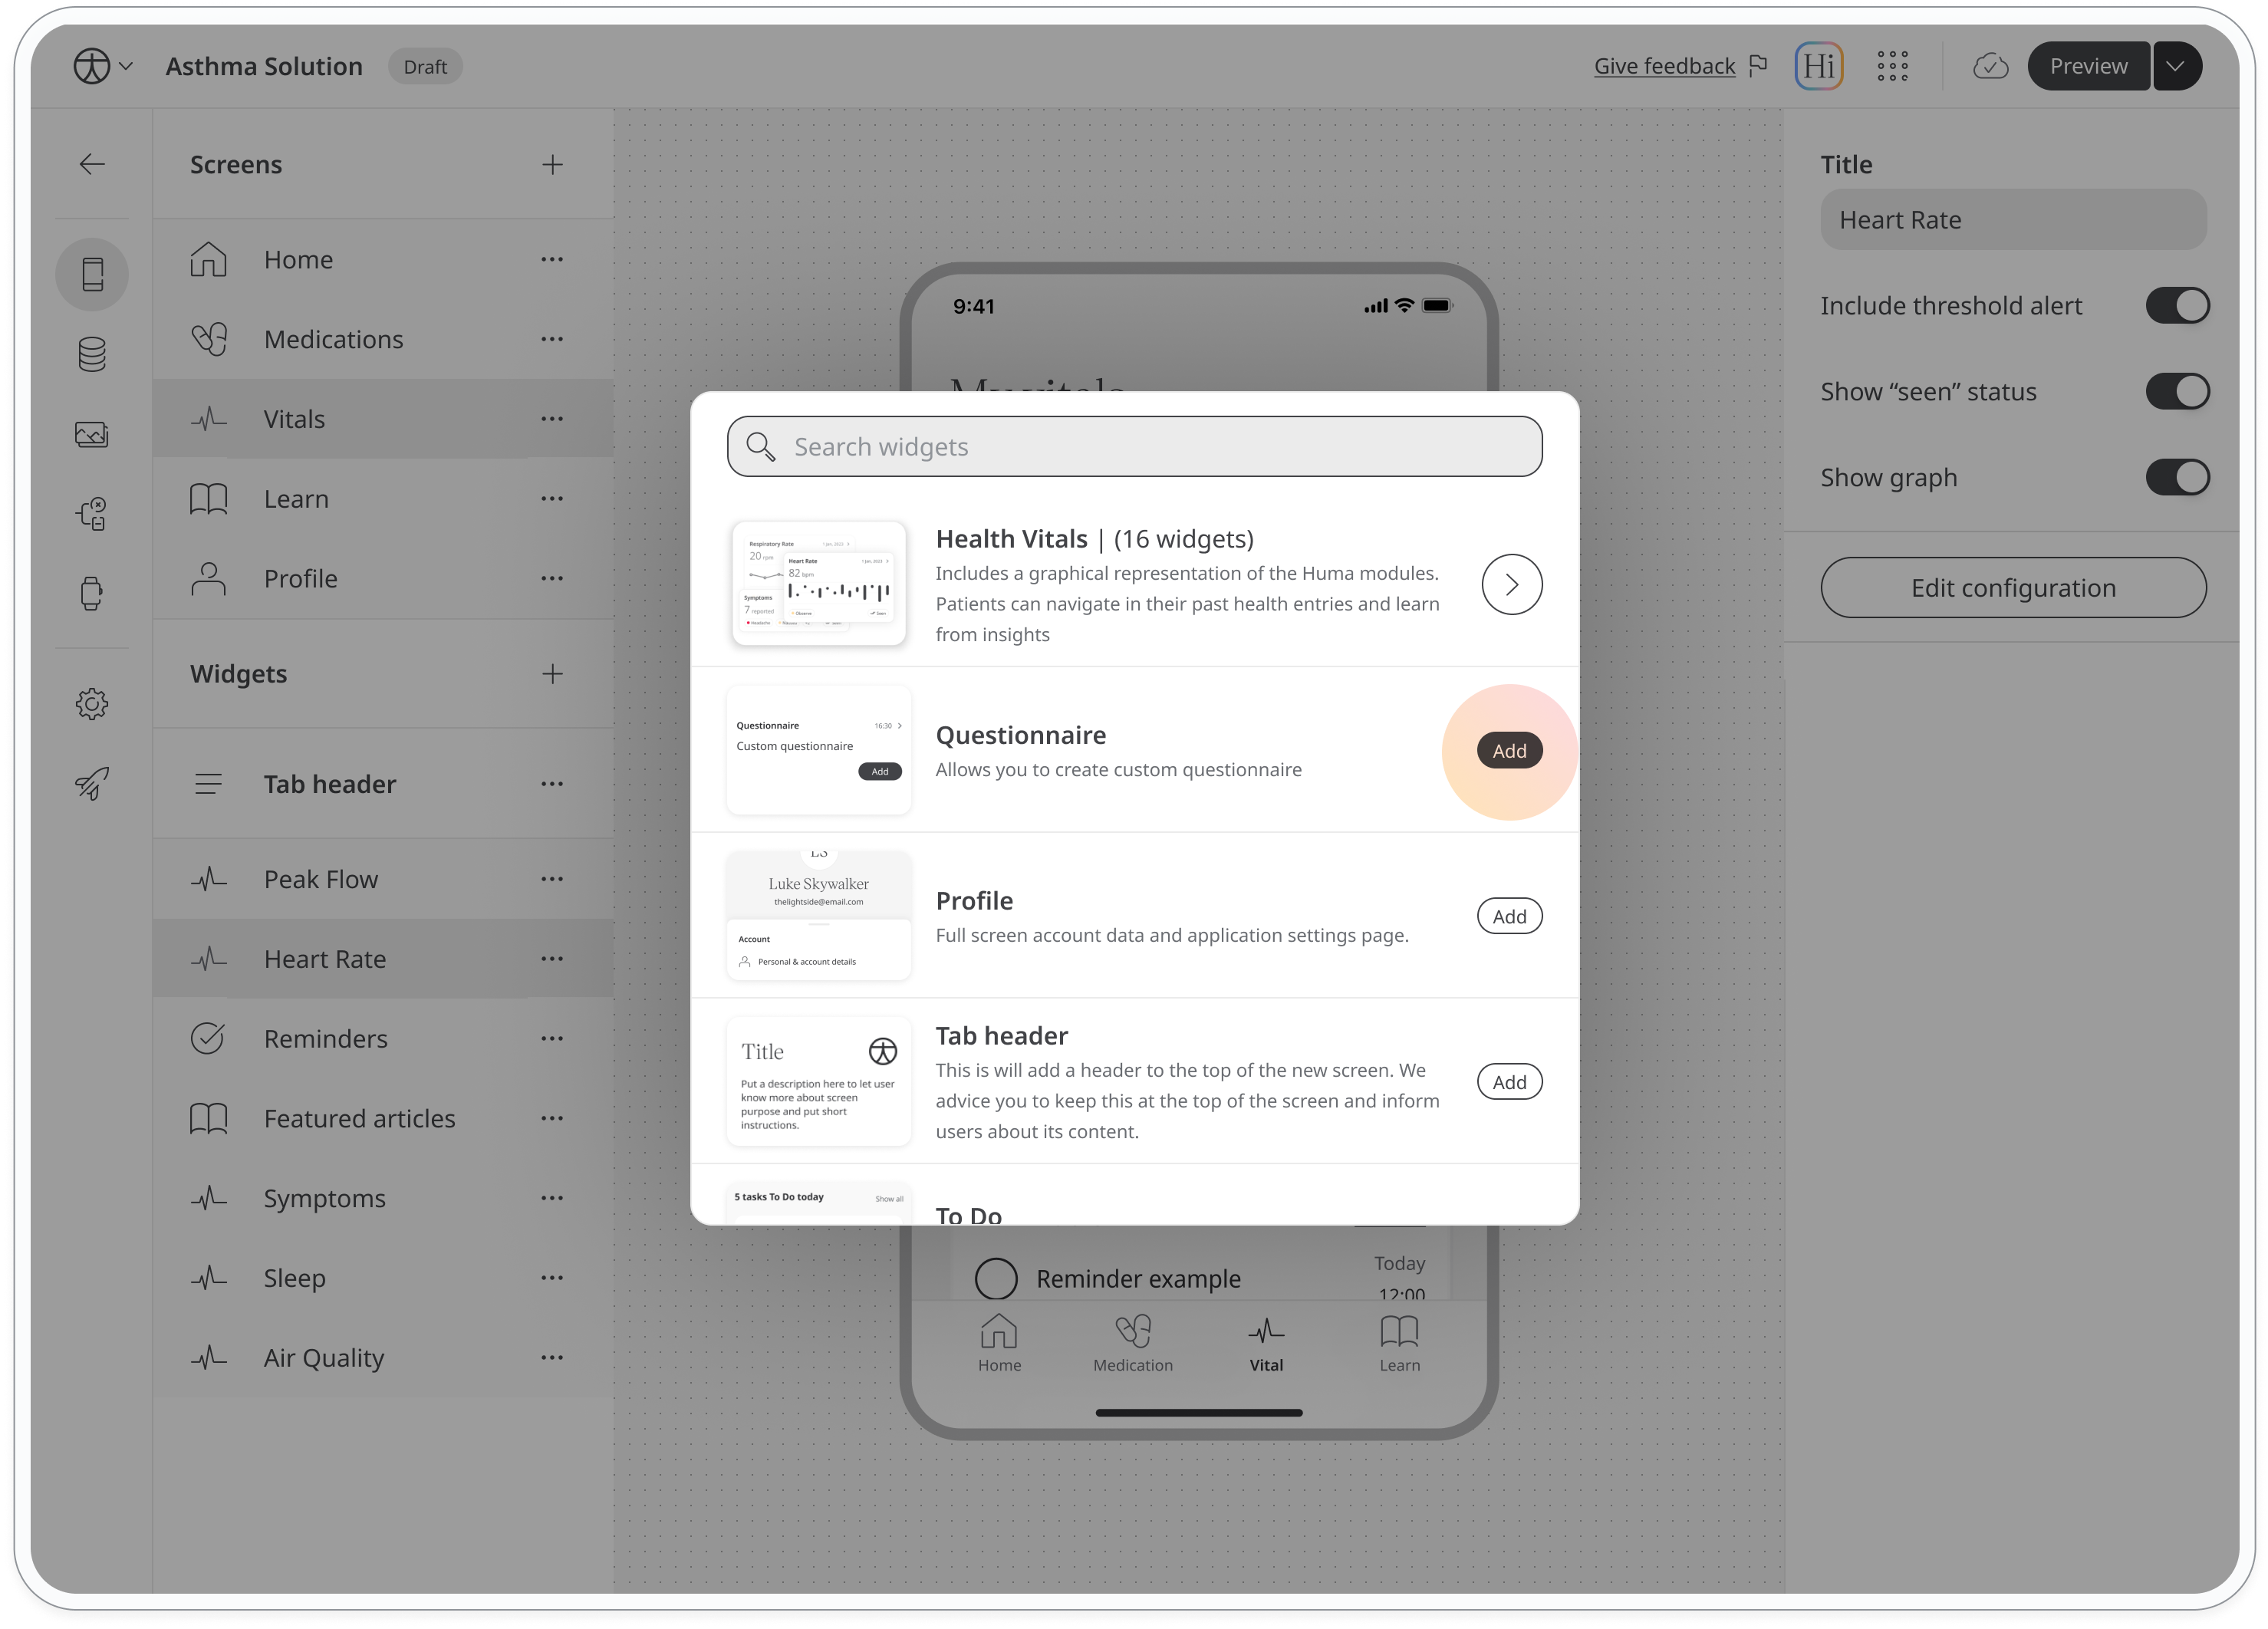
- Add questionnaire widget: Scroll through the widgets and find the Click on the Questionnaire option, then click to add it to your screen.
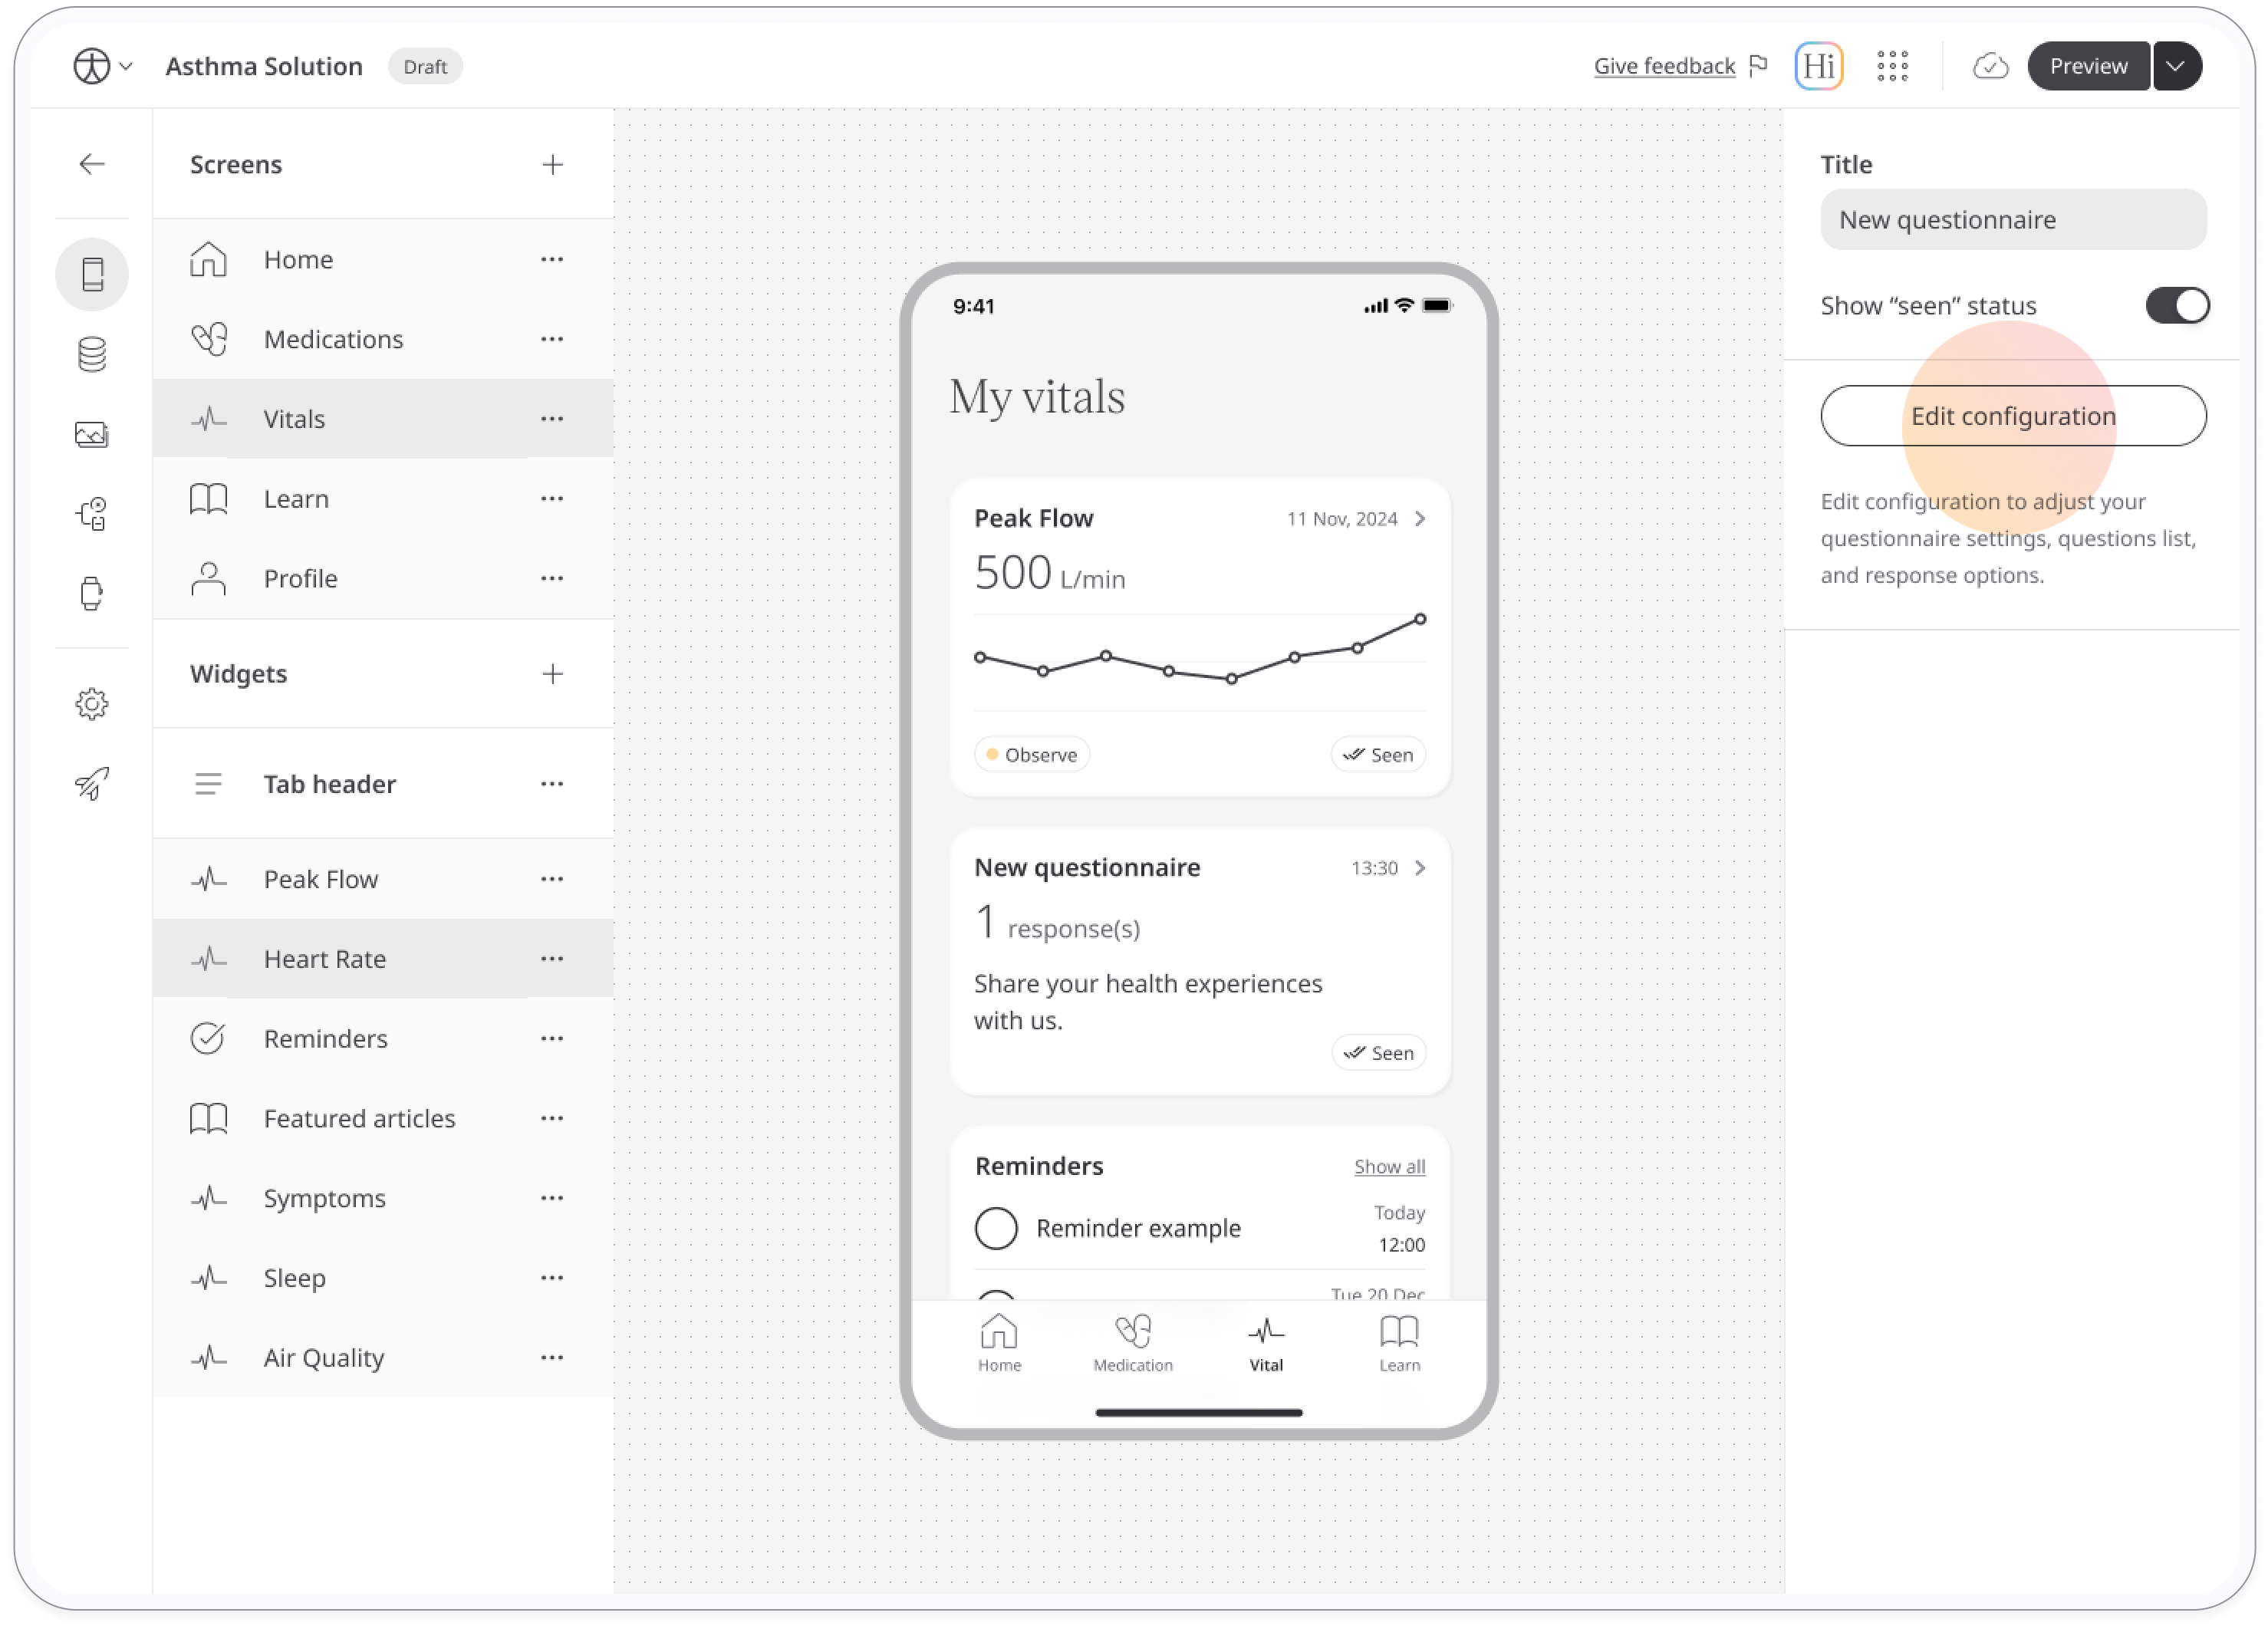
After adding the questionnaire widget, customise it using the available options on the right sidebar. You can configure the questions, answers, and add logic and score calculation by tapping on the Edit configuration button.
Following the Edit configuration button, four main sections, each offering flexible features to help you create a range of questionnaire types:
- Settings
- Questions
- Logic (if applicable)
- Score Calculation (if applicable)
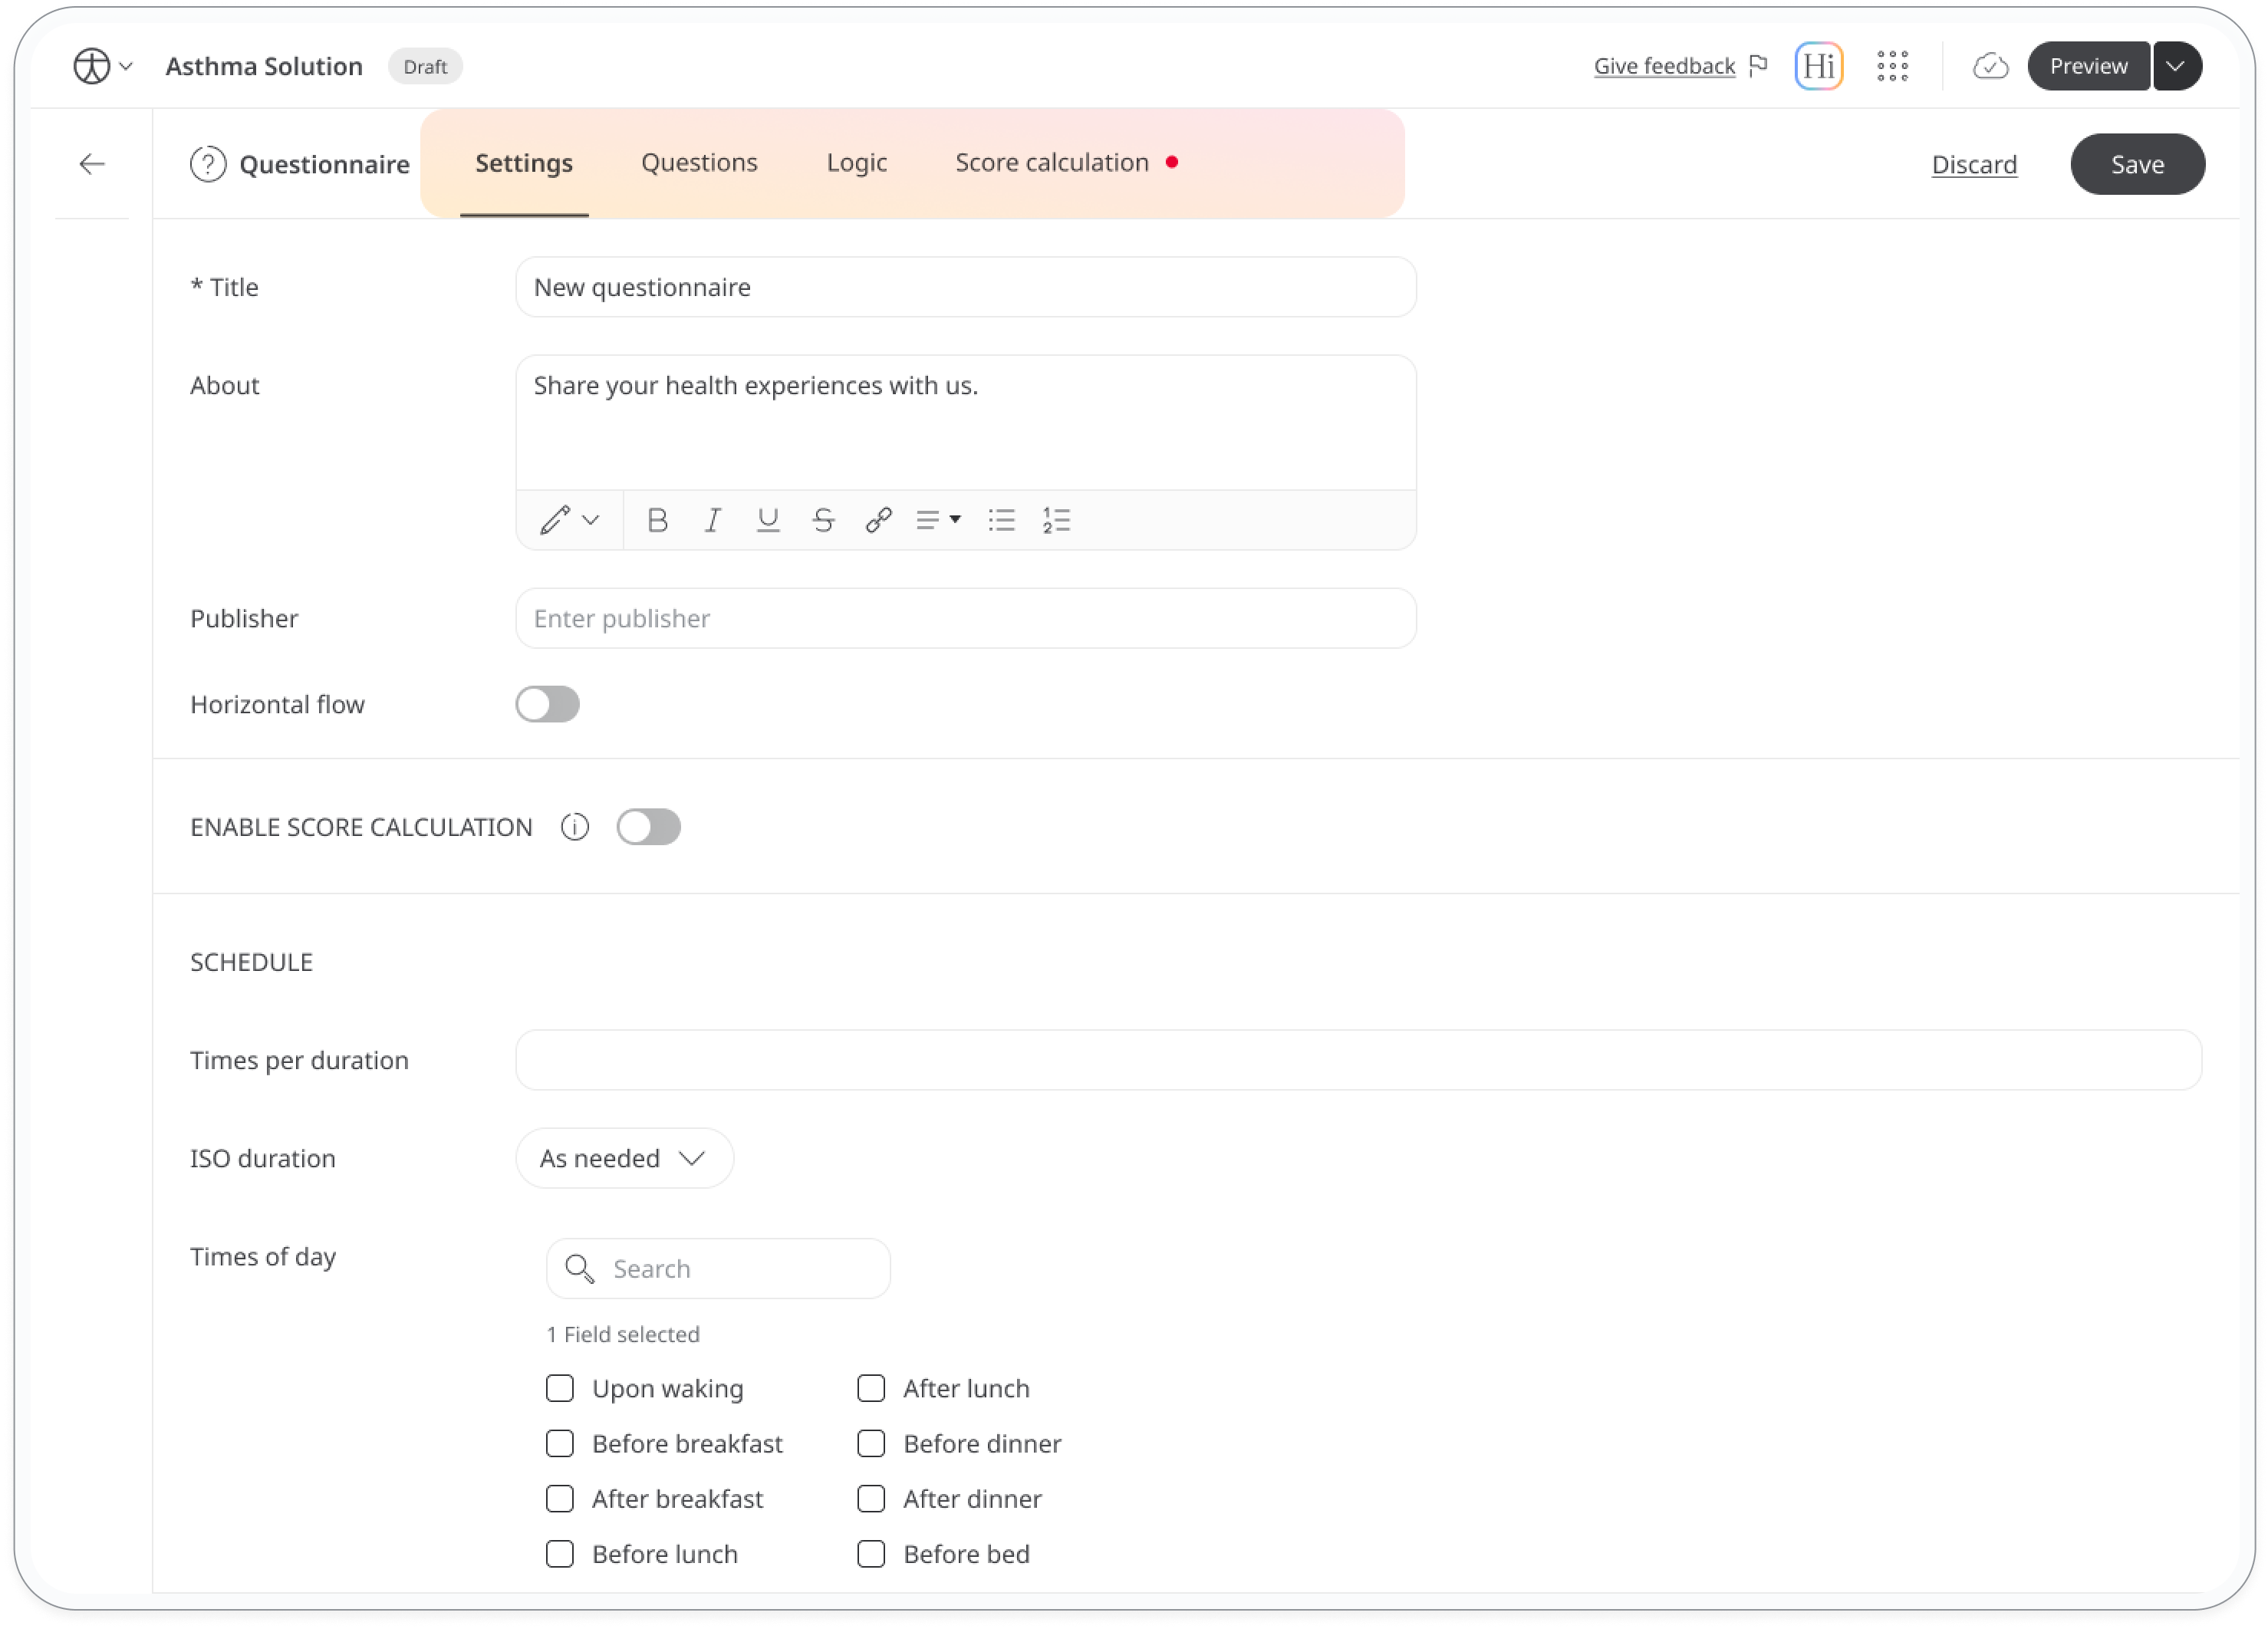
Establish general settings
Under the Settings tab, you’ll find customization options for your questionnaire:
- Title: Give your questionnaire a clear and descriptive title that helps users understand its purpose (for example, "Weekly Health Check-In" or "Mental Health Assessment").
- About: Optionally, add a brief message explaining the questionnaire’s purpose to provide respondents with context.
- Publisher: Optionally, indicate organisation or person responsible for the questionnaire.
- Horizontal flow: Optionally, enable this option to allow horizontal navigation within the questionnaire in the patient app.
- Enable score calculation: Optionally, toggle Enable score calculation on to allow calculated scoring. When enabled, a new Score calculation tab will appear next to the Logic tab.
- Schedule: Set a specific time for sending out the questionnaire to respondents.
- Footnote text: Add any relevant clinical advice, disclaimers, or trademark text here.
Add questions to the questionnaire
Next, in the Questions tab, add all the necessary questions by clicking the + New question button. Configure each question using the right sidebar to suit your specific needs.
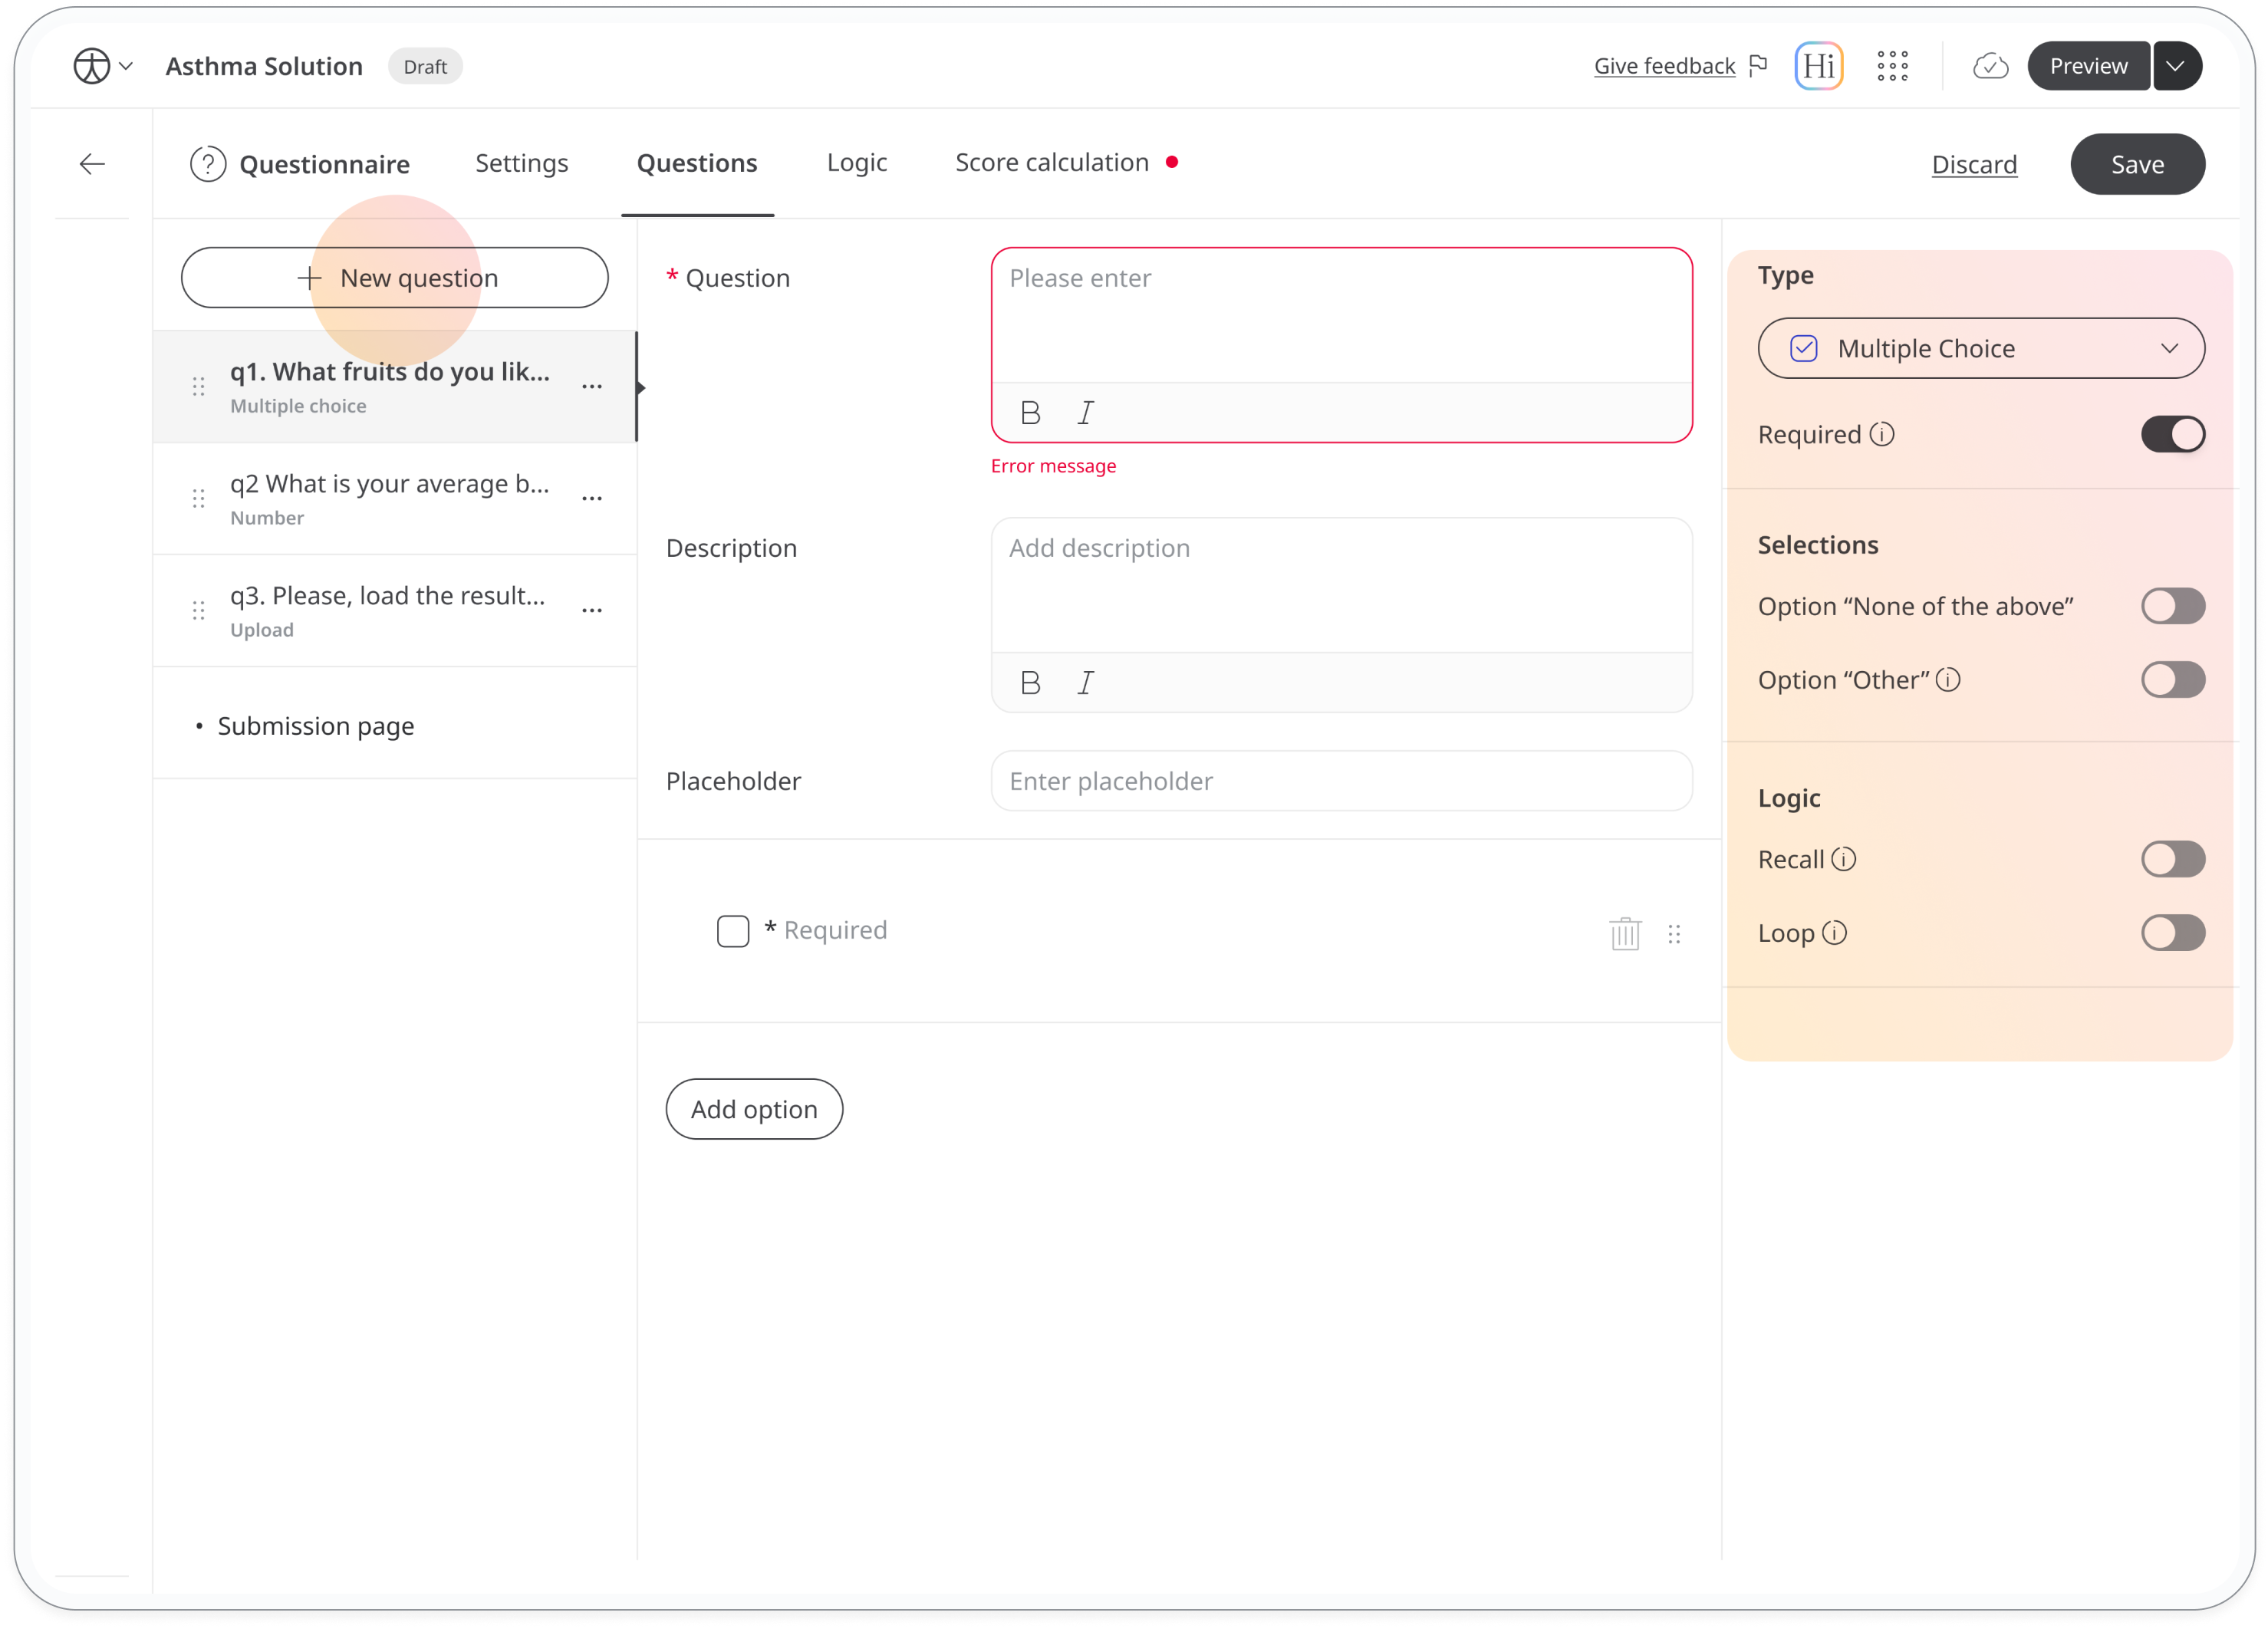
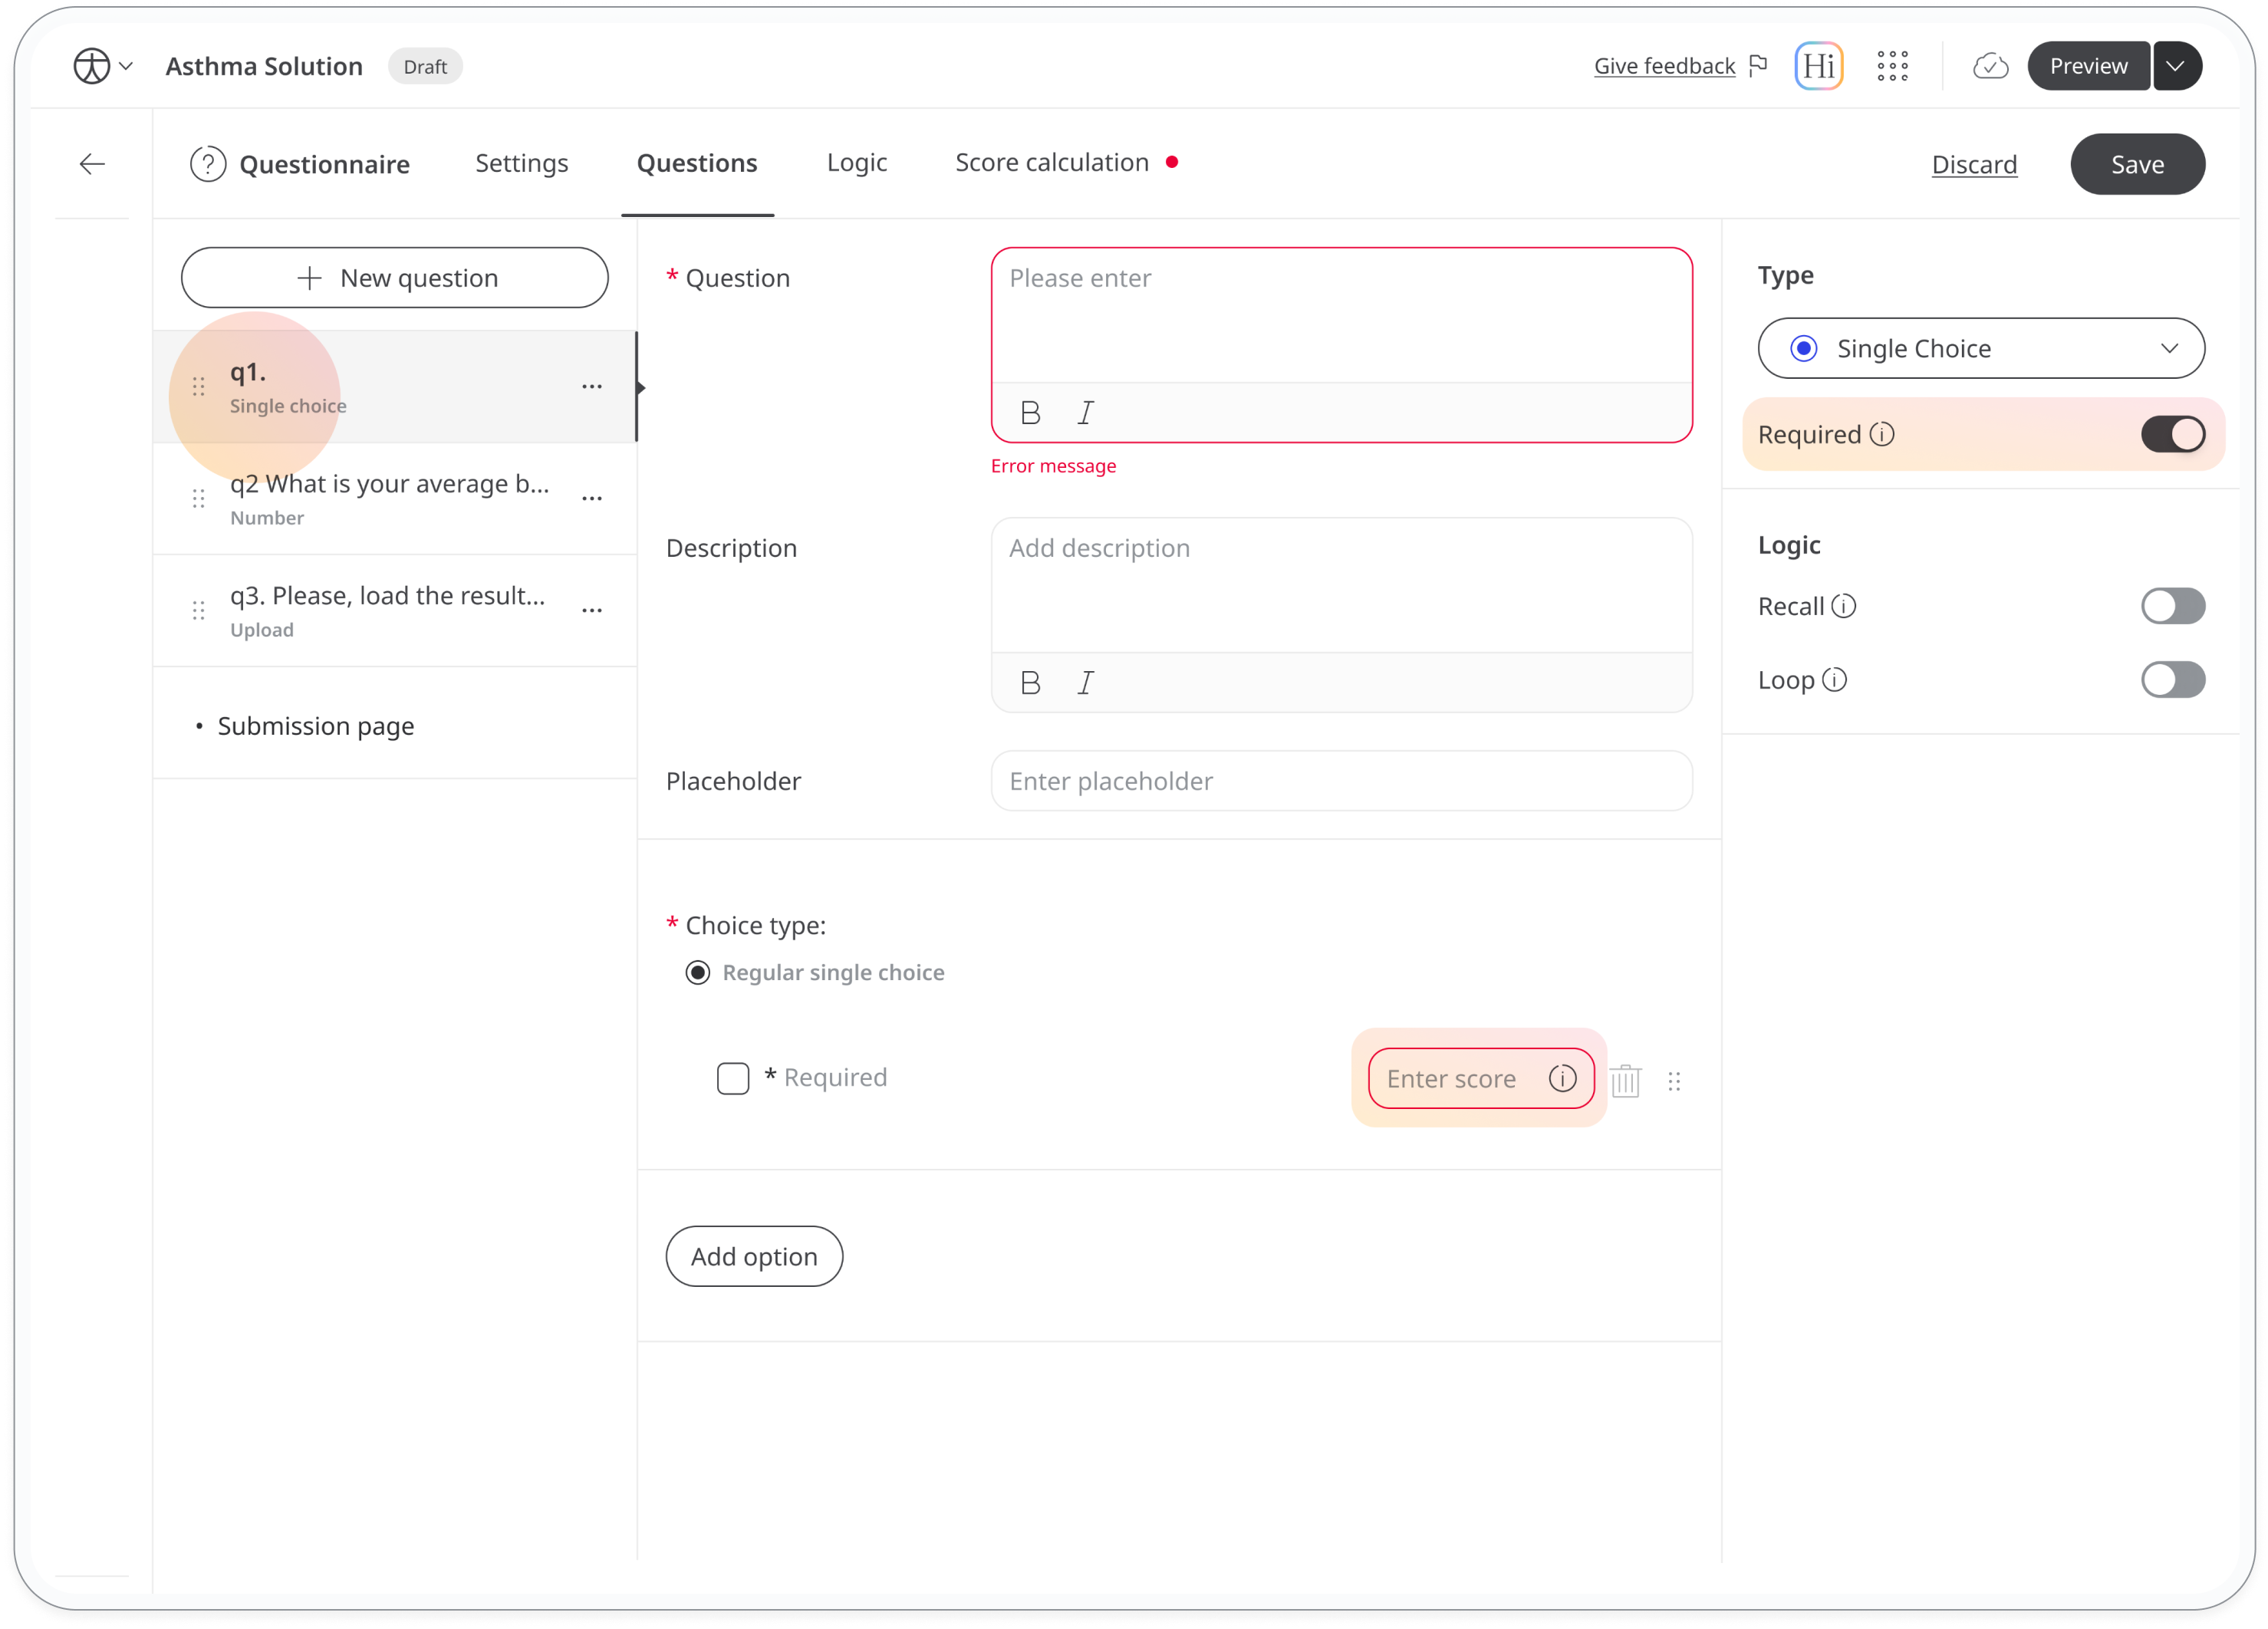
If you've enabled score calculation, you'll use both single-choice and scale questions in your calculations. For single-choice questions, ensure they are marked as required and assign accurate numerical values to each answer option. Scale questions will automatically have values based on the scale settings but also need to be required for accurate scoring.
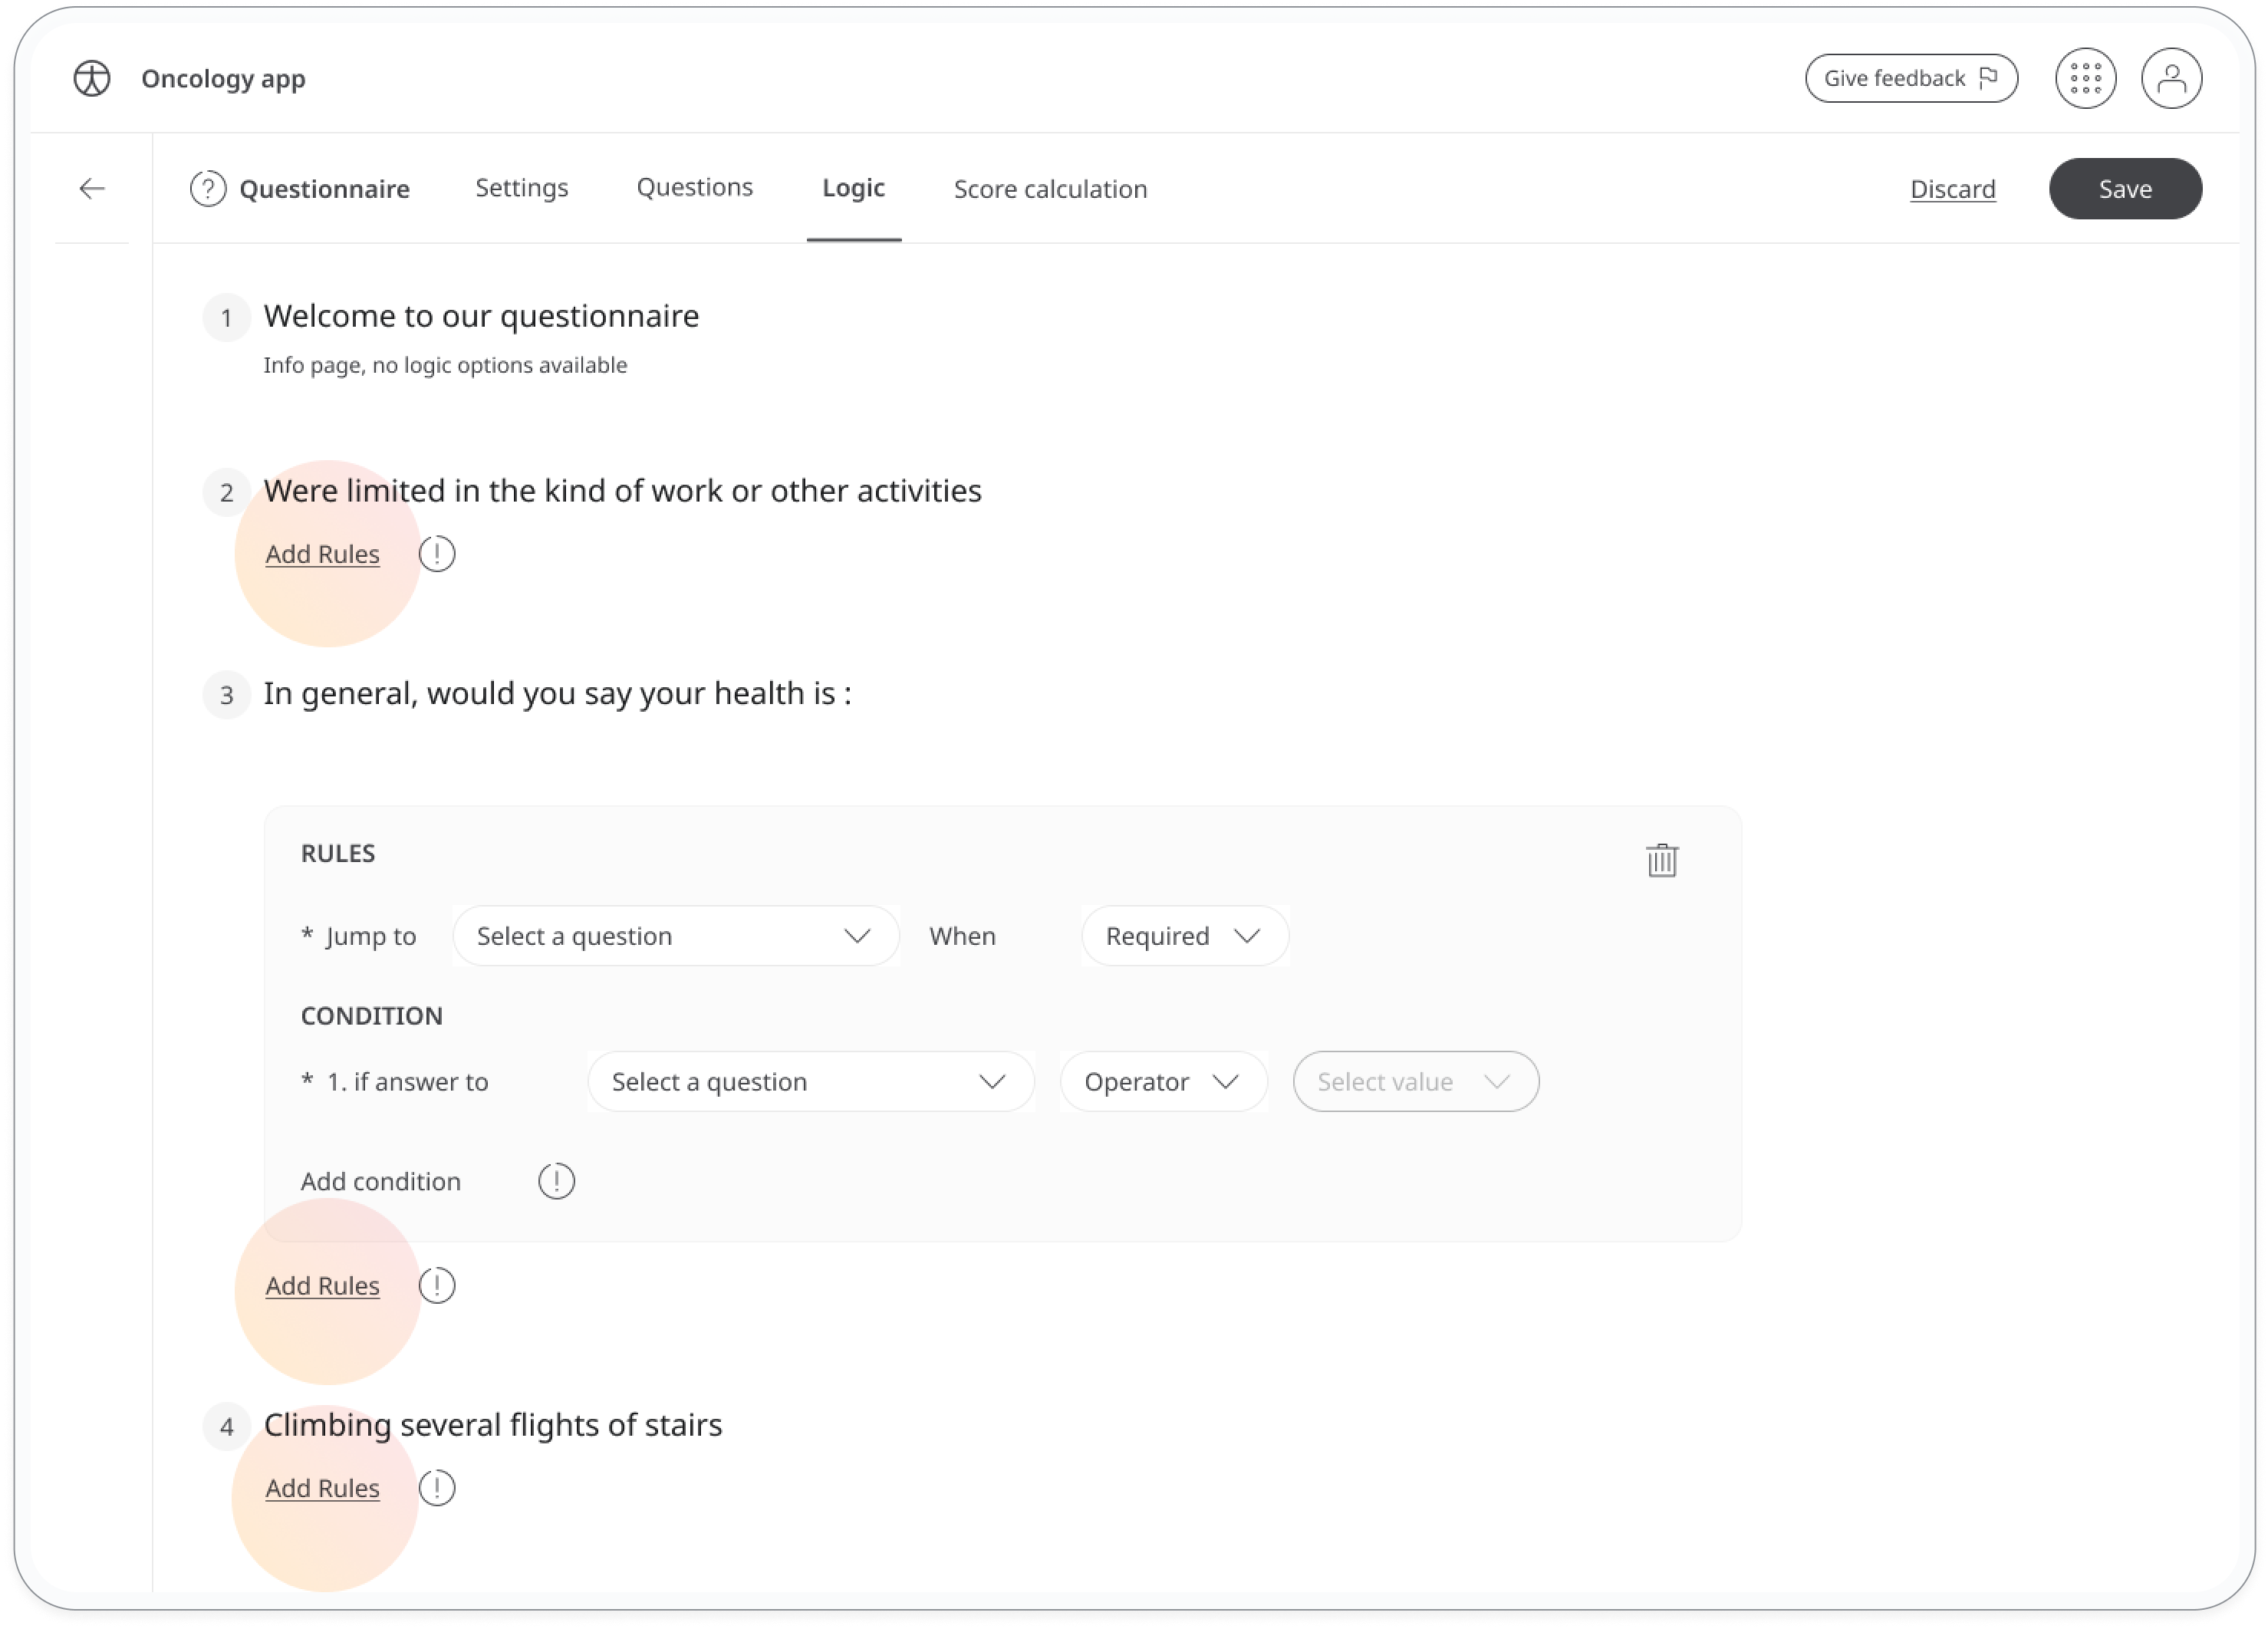
Apply logic
Navigate to the Logic tab, you can set up any necessary rules by adding conditions for each question. Click on Add rule for each question to create custom flows or conditional behaviour.
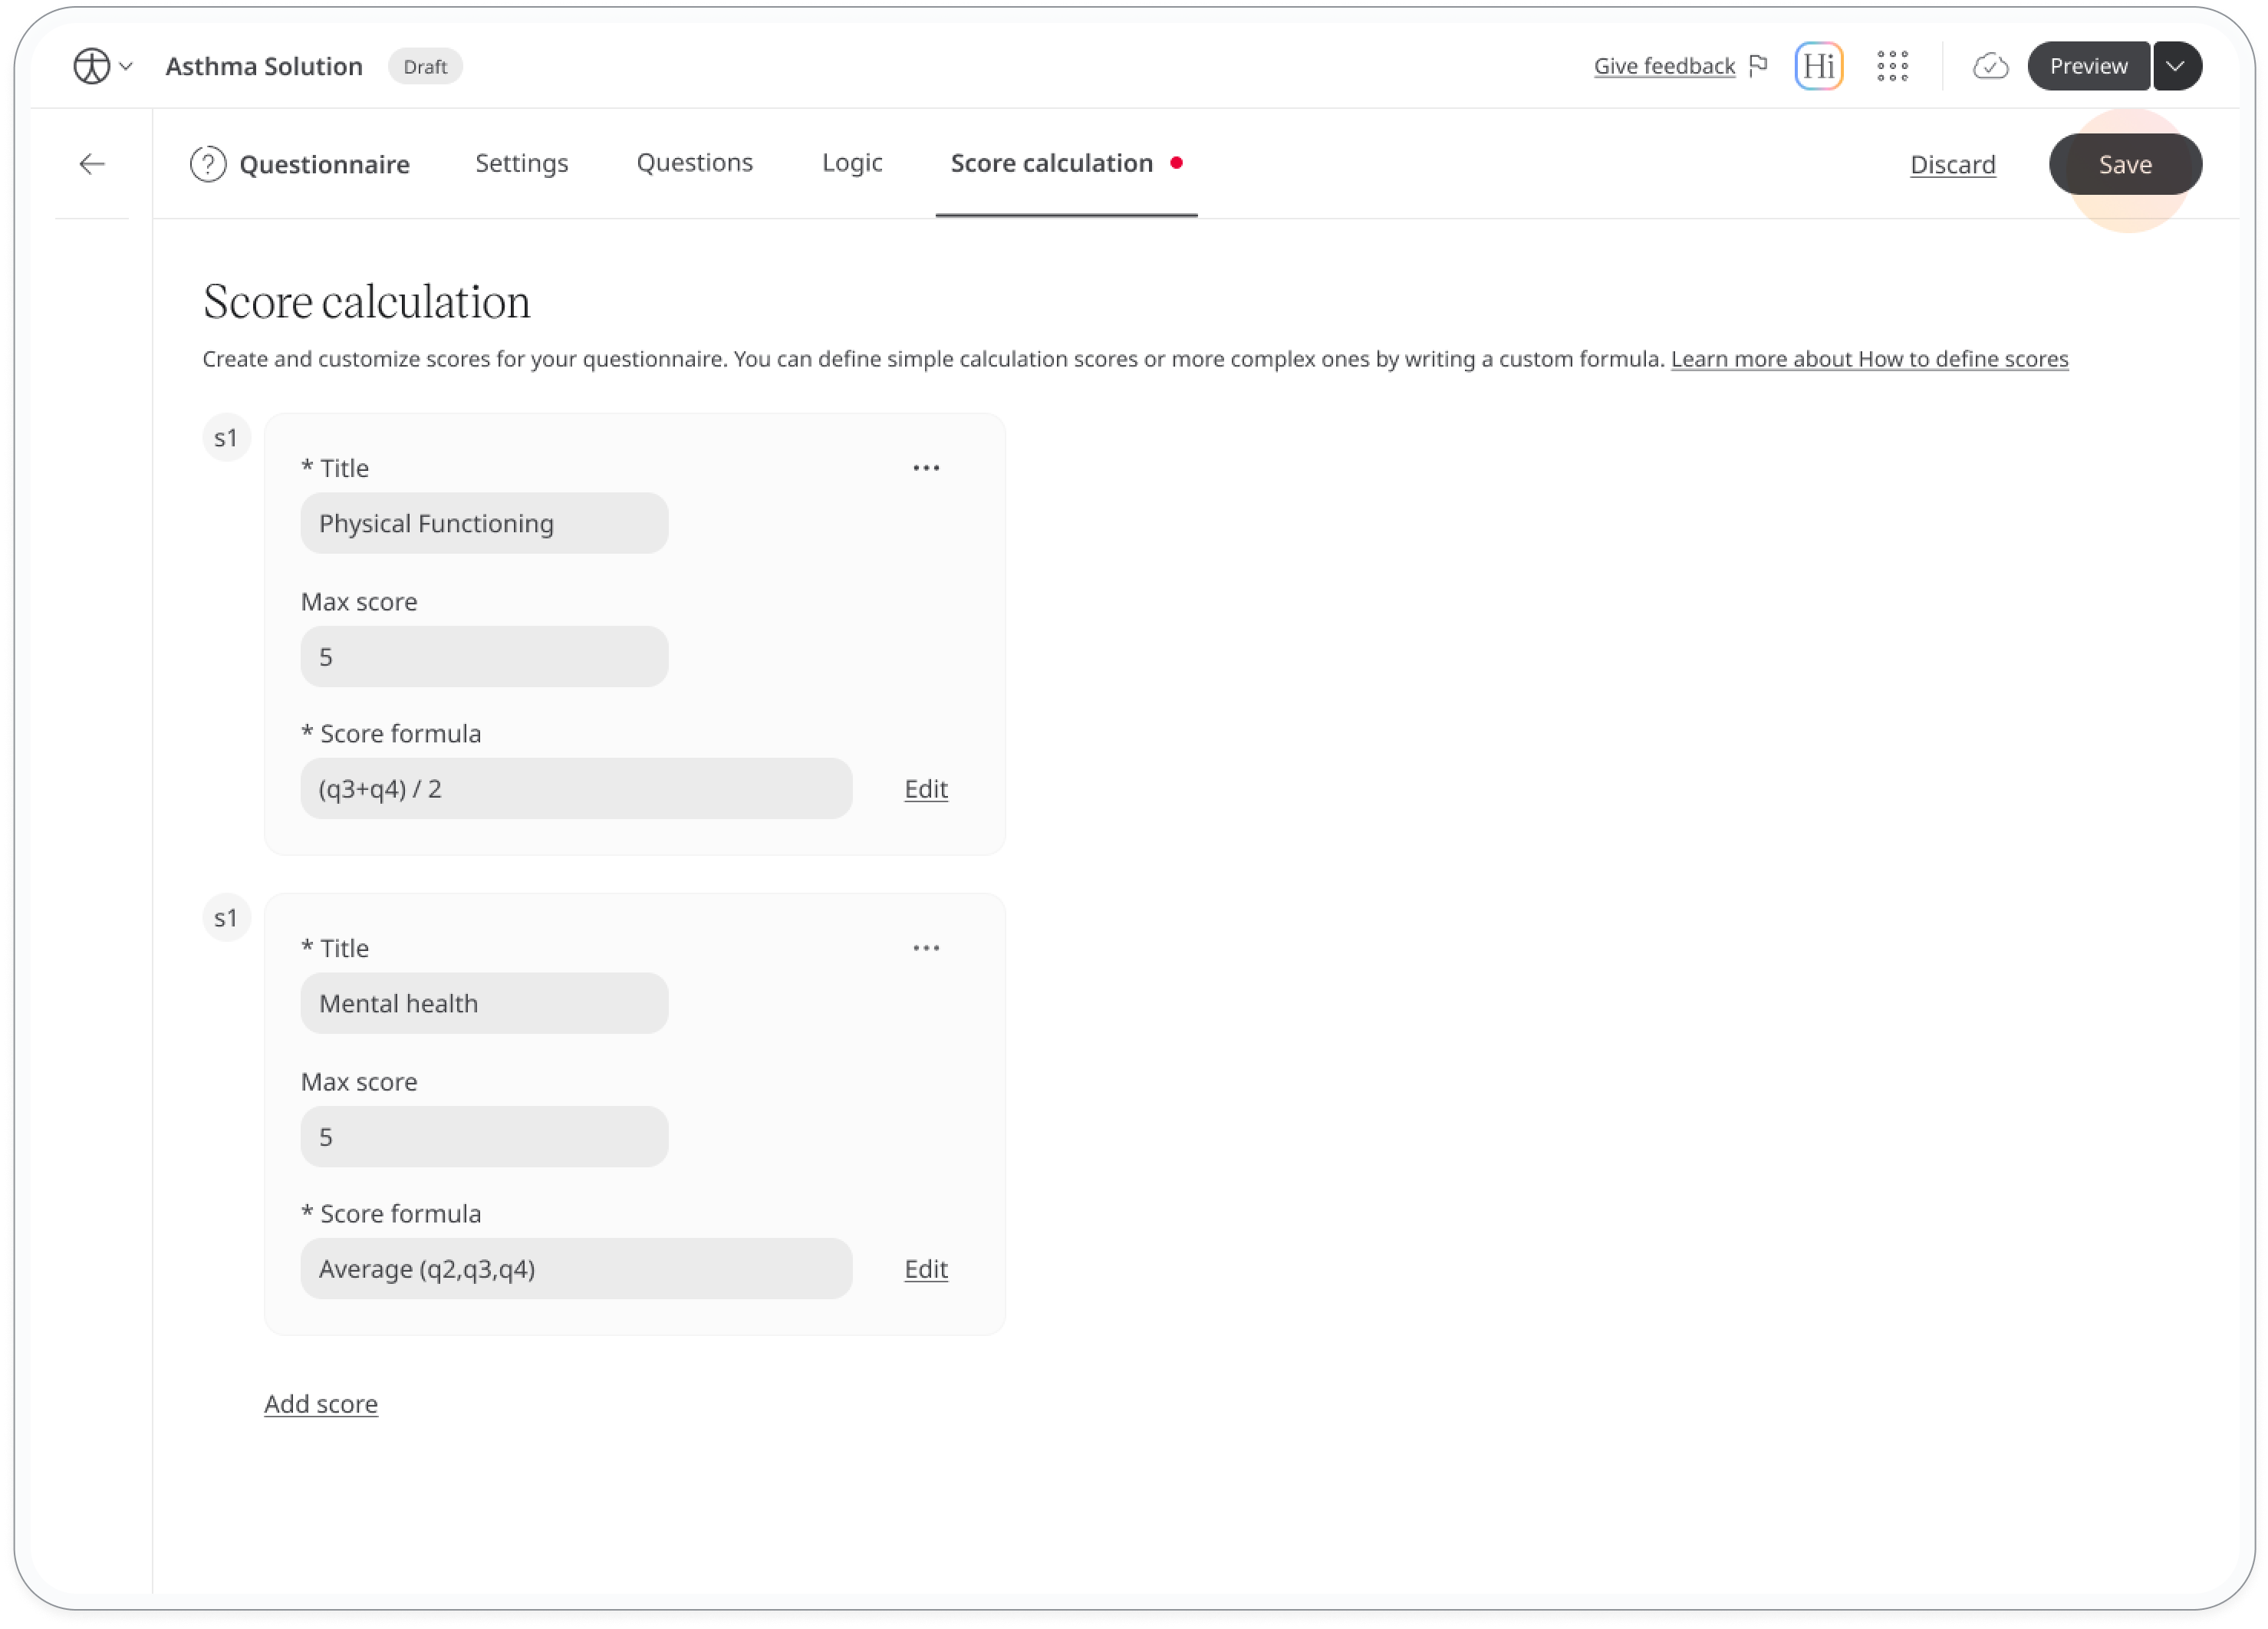
Define calculated score(s)
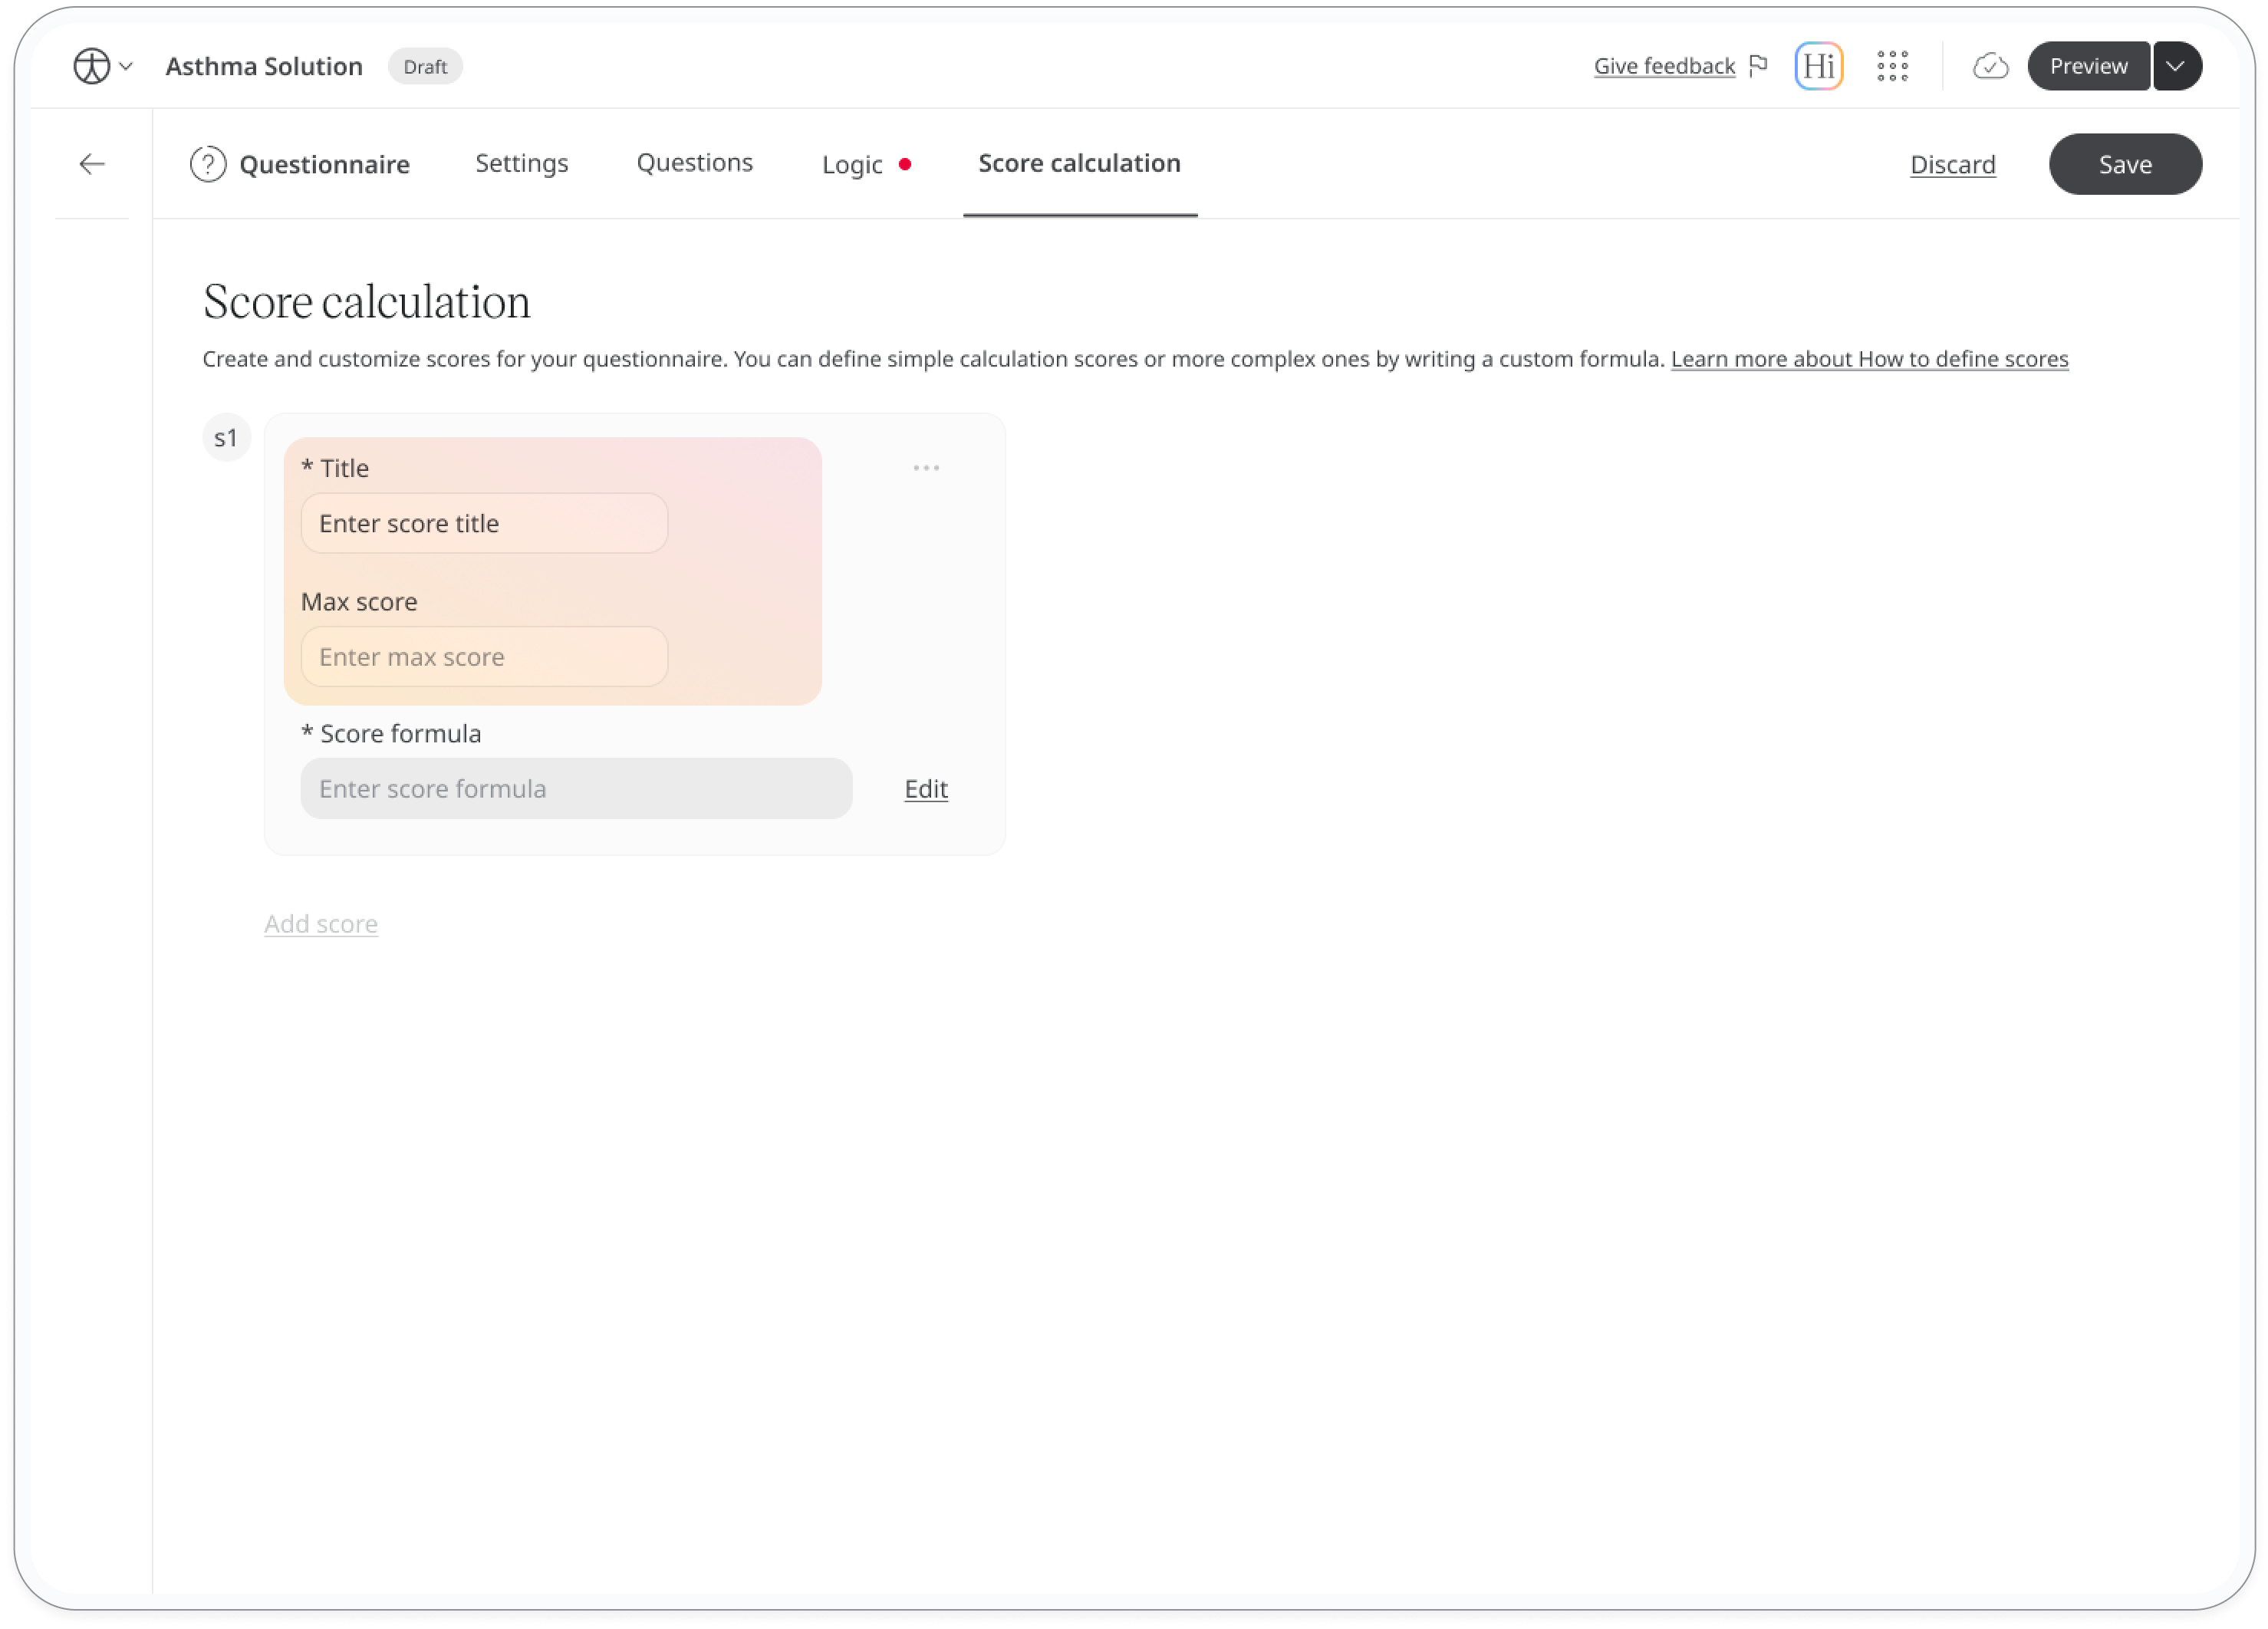
Once enabled core calculation in setting, this tab appears, allowing you to define as many as calculated scores you need:
Title: Enter a name for your score and make it clear, concise, and meaningful (for example, "Physical Functioning"). Each score should have a unique title with at least two characters.
Max Score (optional): If applicable, add a maximum possible score to help the care team understand the scoring scale.
- Score Formula: Select Edit button next to the formula field to open a sidebar where you can enter your formula. The right sidebar displays all available variables to help you construct the formula accurately. After writing the formula, click Update to save.
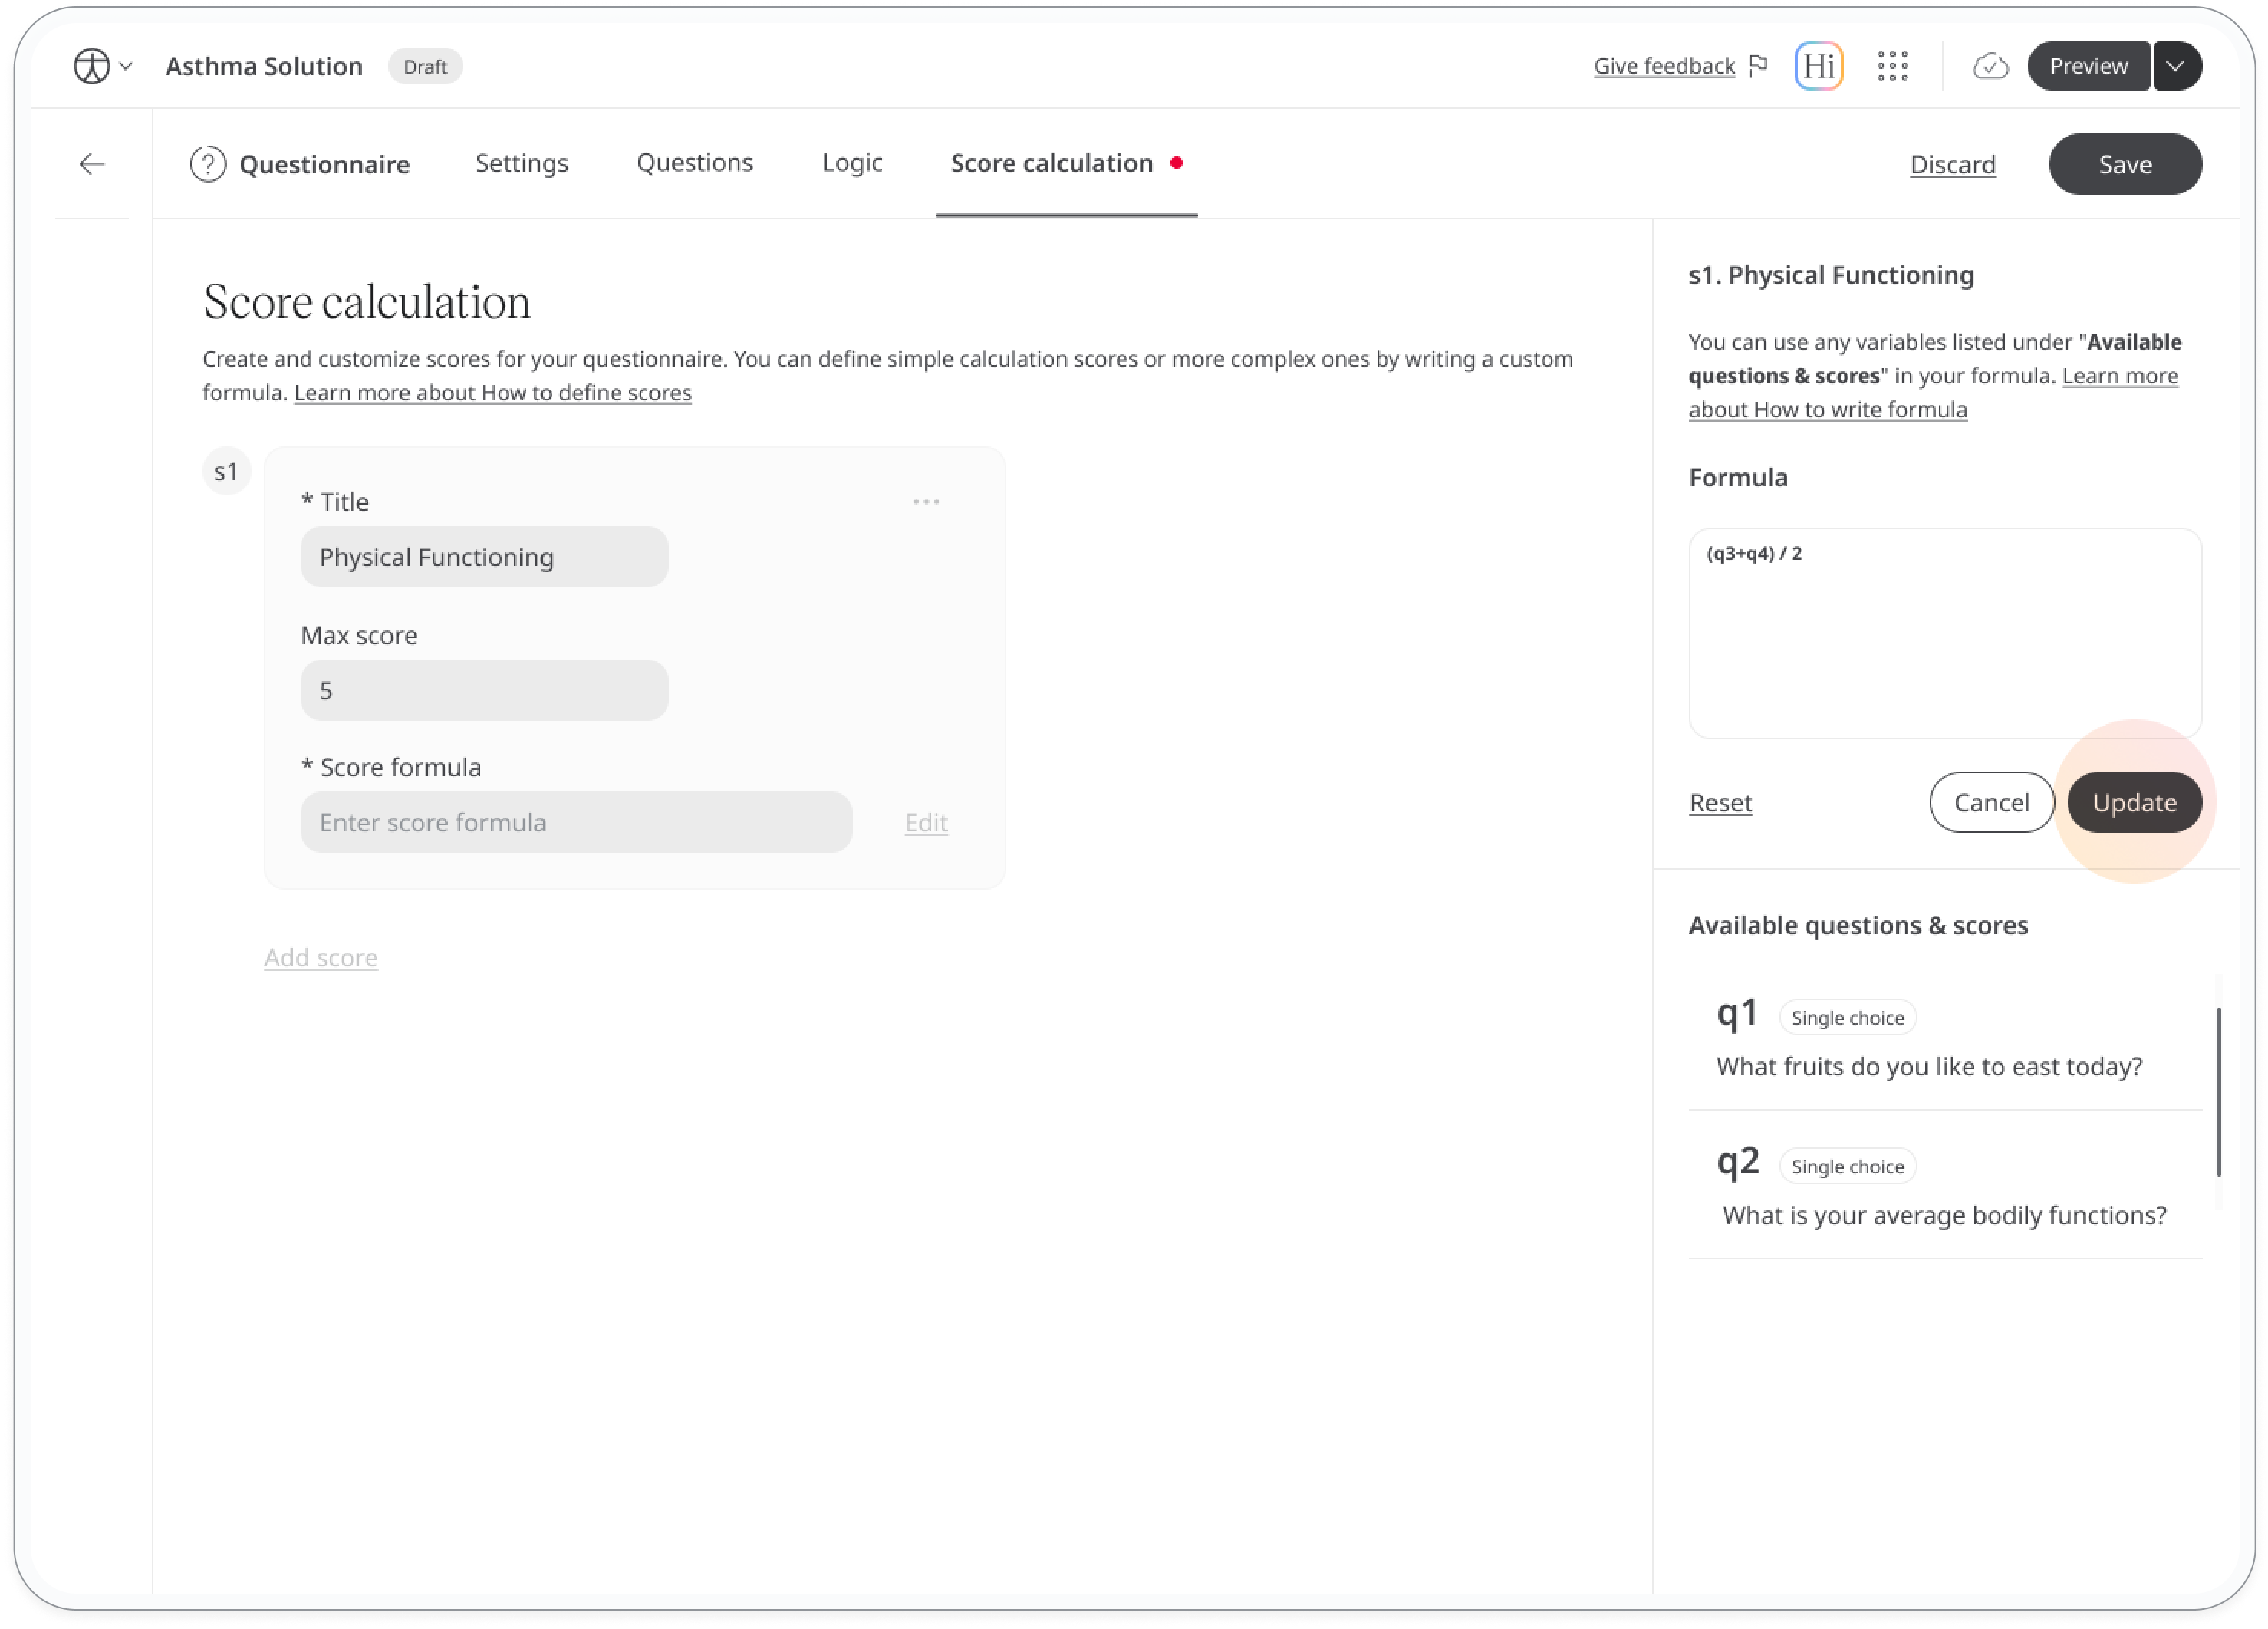
How to write a formula
Here are some tips to help you avoid formula errors and ensure it works correctly:
- Use only allowed variables: Only use variables from single-choice questions, scale questions, or pre-defined scores (these are listed under the formula editor)
- Match notation exactly: Use exact names for variables. For example, questions should be labelled as
q1,q2, etc., and scores ass1,s2, etc. - Check parentheses carefully: Make sure every open parenthesis has a matching closing parenthesis.
- Use approved operators and functions: You can only use the following functions and operators with their exact notation:
- Operators:
+,-,*,/, commas - Functions:
average()
- Operators:
- Use commas correctly in functions: When using functions, separate each variable with a comma. For example:
average(q1,q2,q3,s1,s2). - Include all necessary operators: Don’t forget to include operators between variables where needed.
- Ensure formula is evaluatable: Double-check your formula to make sure it won't result in
0or∞. - Avoid undefined variables: Only use variables listed in the formula editor.
- Prevent circular calculations: Avoid referencing one score within another score’s formula if it’s also used in the original calculation, to prevent any looping issues.
Add new scores
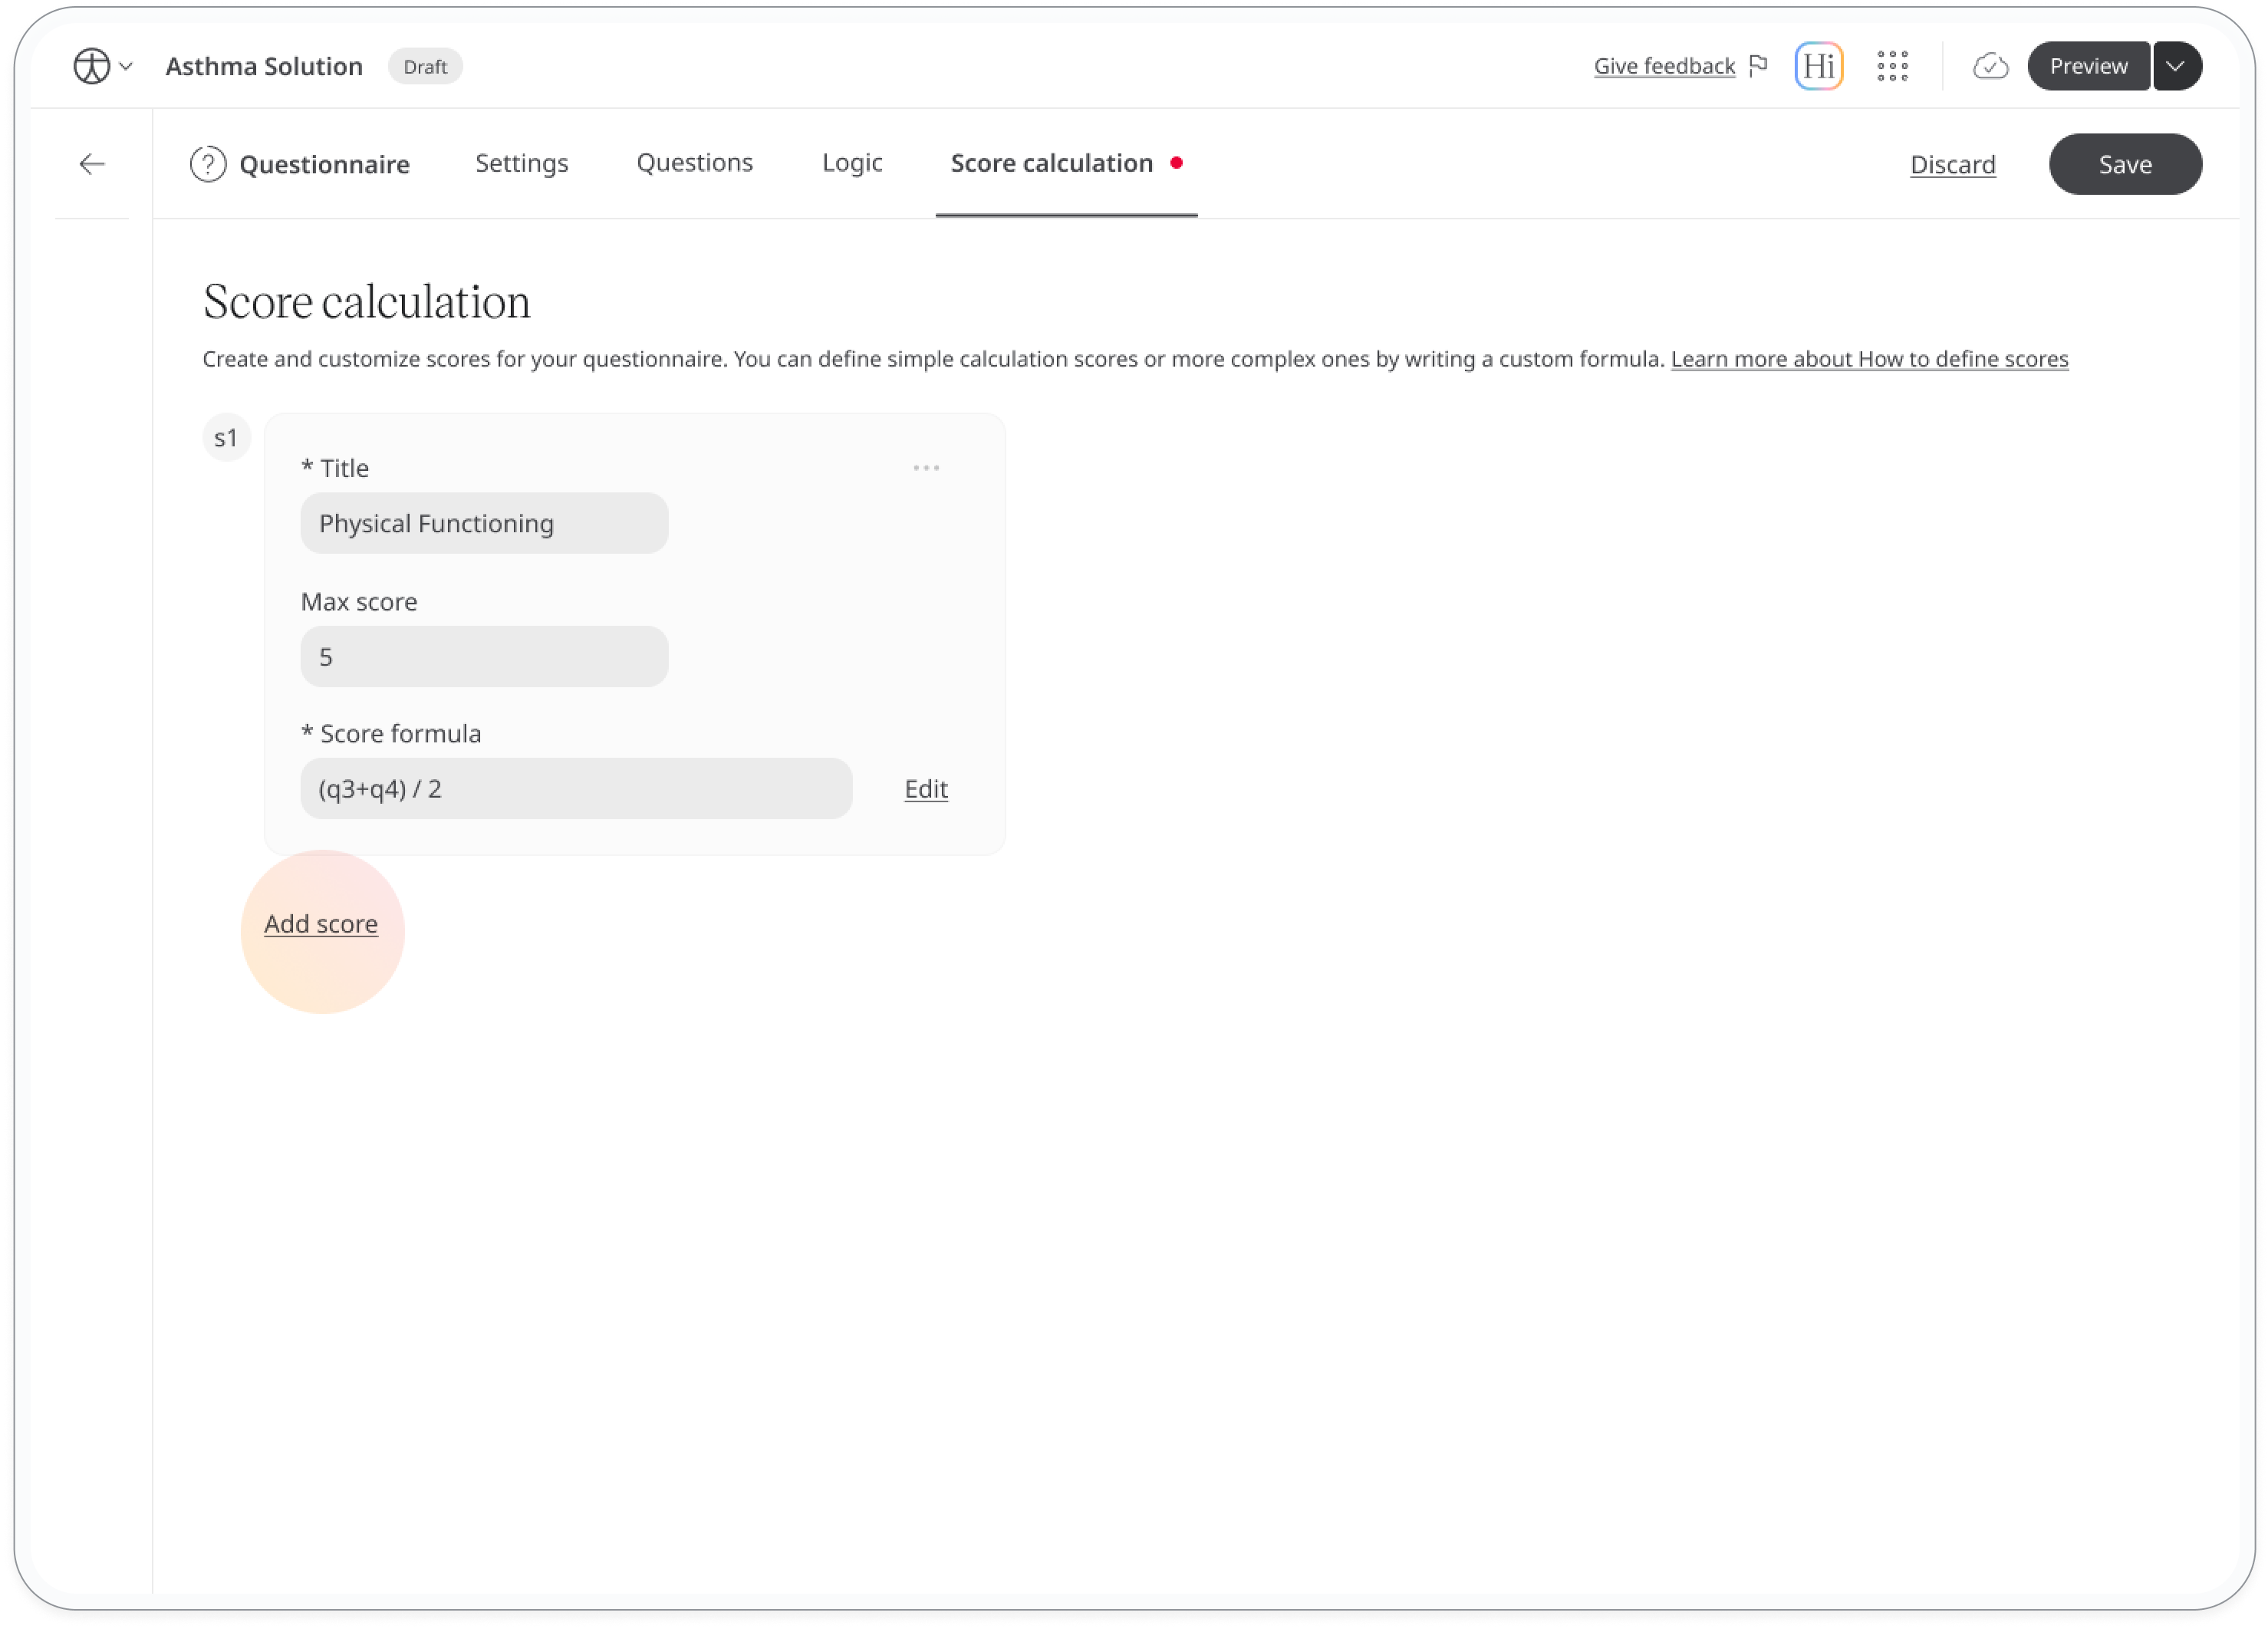
To add more scores, click the Add score button at the end of each score box. A new score box will appear, allowing you to repeat the same steps as above.
Configure score(s)
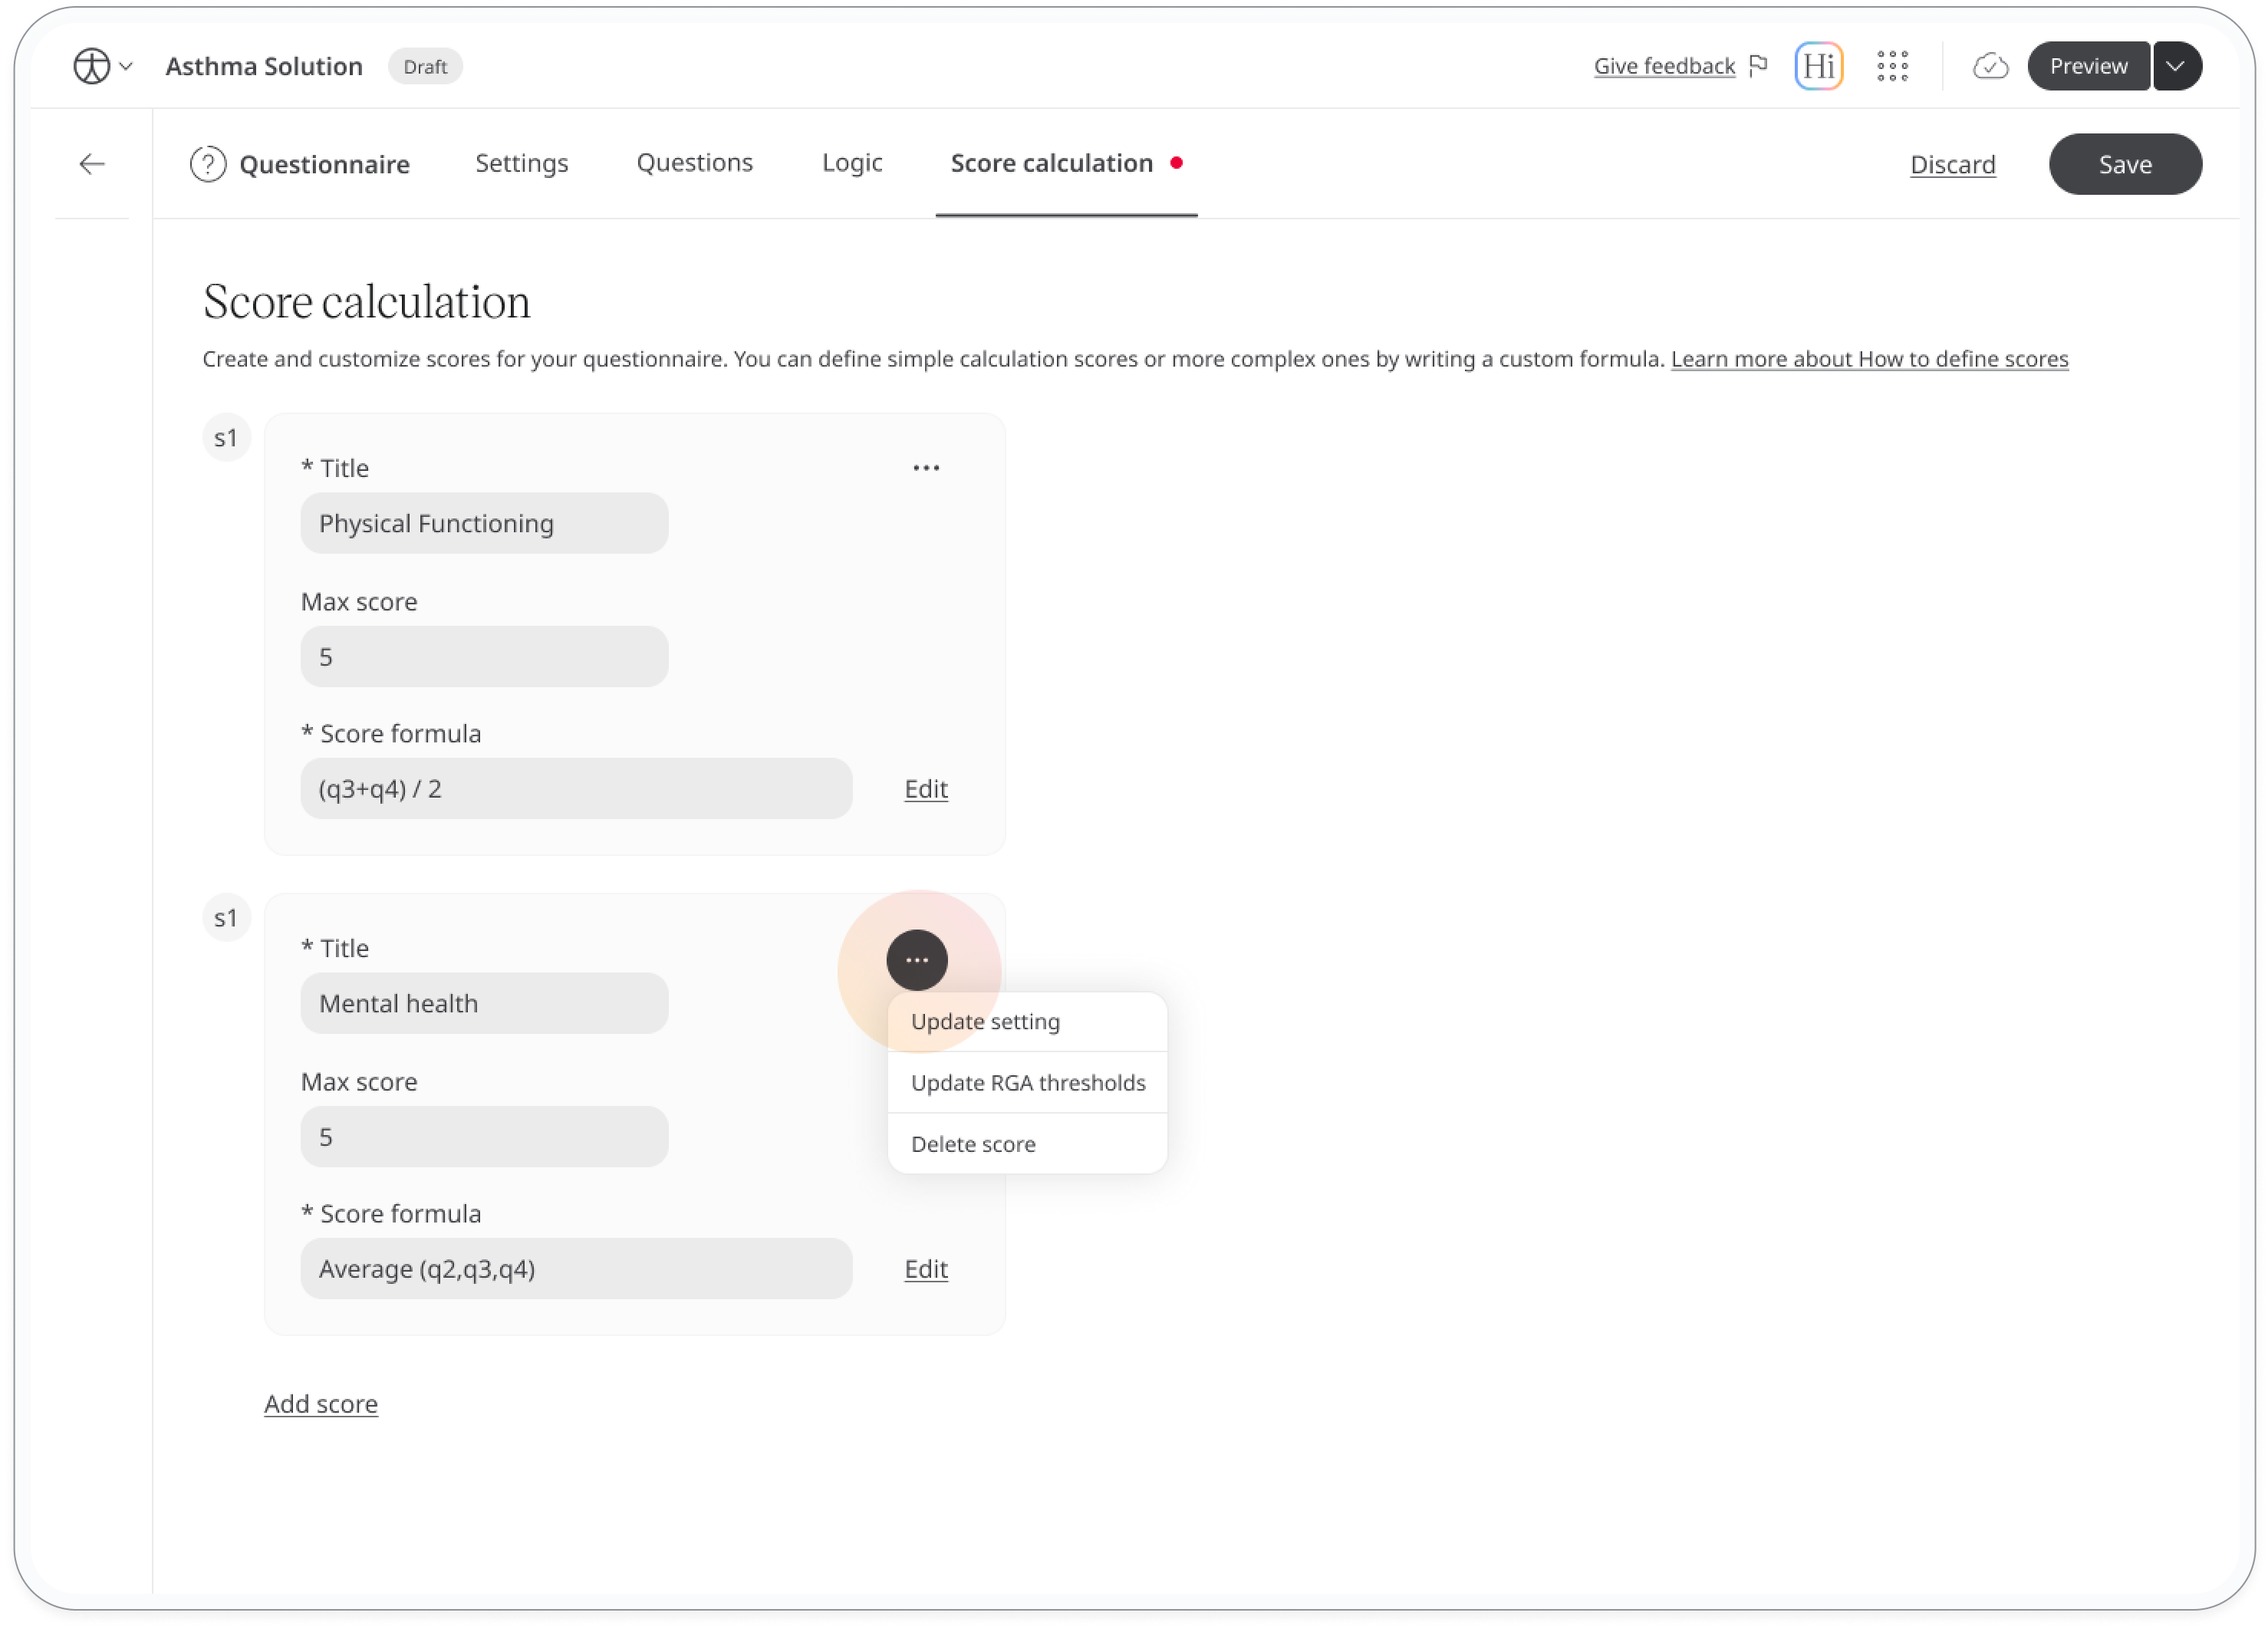
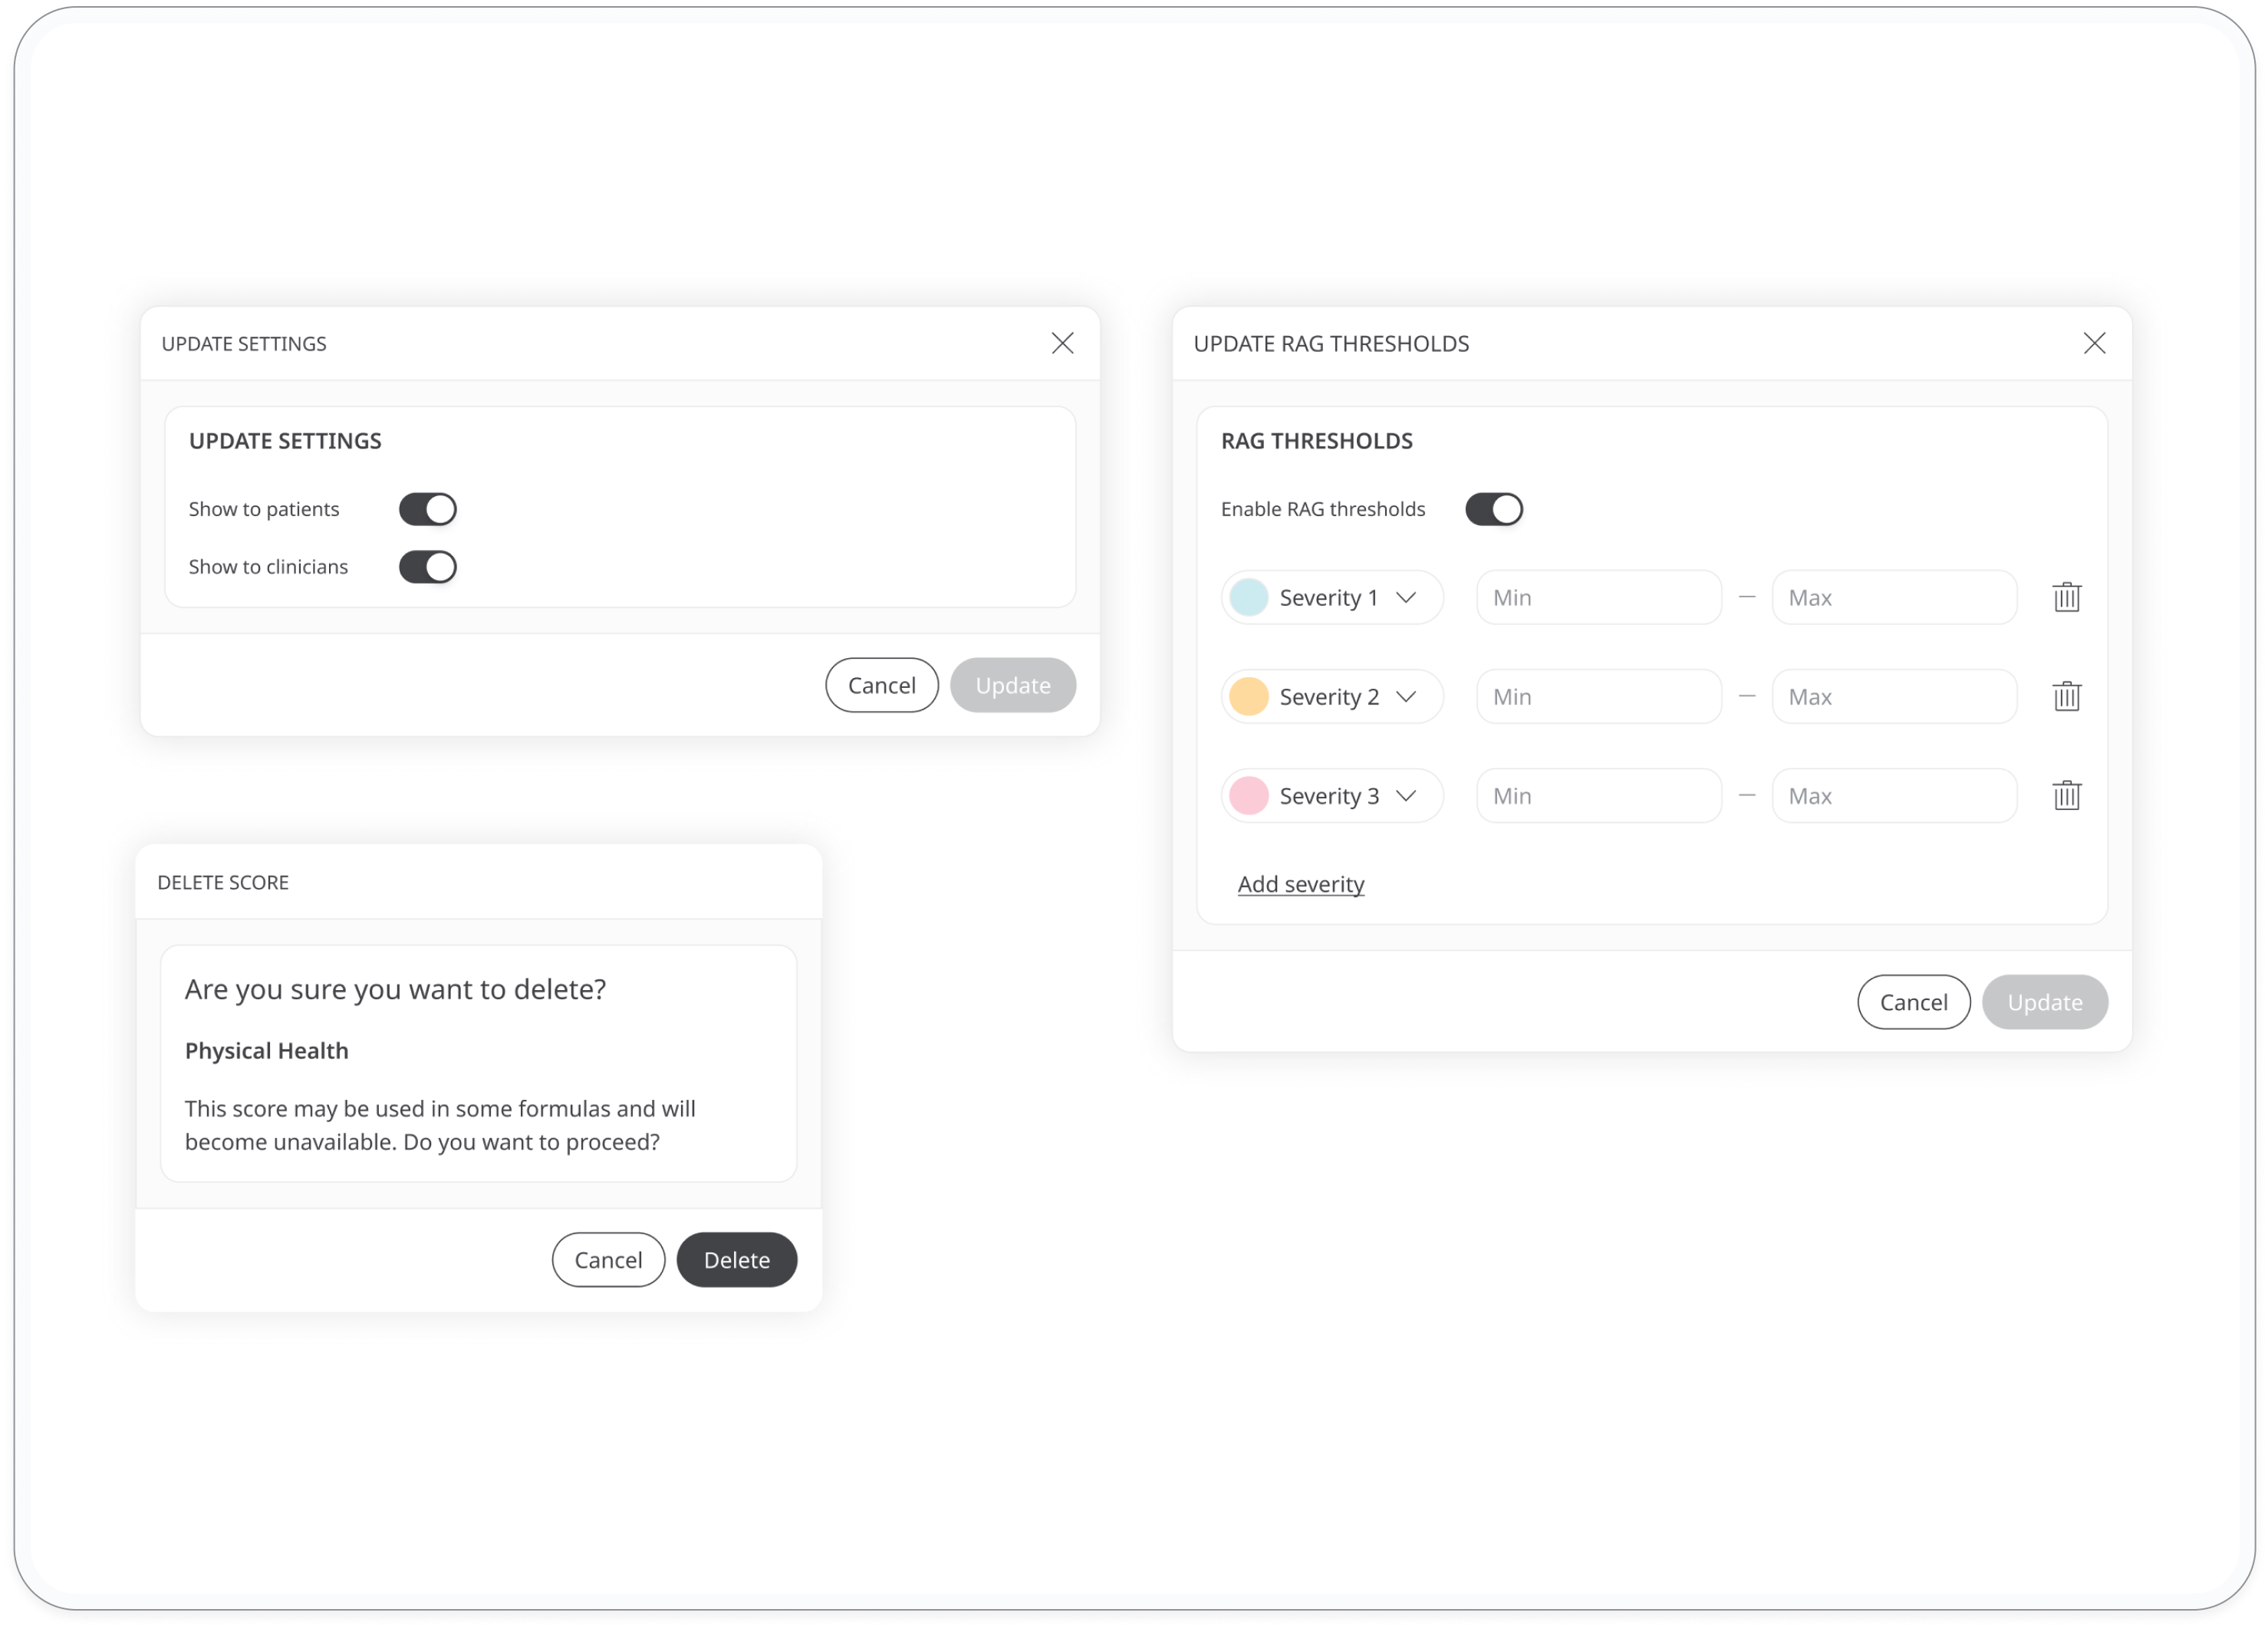
At the top-right of the score boxes, click the three-dot menu to access configuration options. Here’s how to manage them:
- Update RAG thresholds: specify thresholds for Red-Amber-Green (RAG) scoring to categorise results into meaningful ranges (for example, low, moderate, high risk).
- Update visibility setting: Adjust visibility preferences to determine who can see the calculated score.
- Delete score: If a score is no longer needed, use the delete option to remove it. Ensure this won’t disrupt existing configurations or calculations. The first score in enabled calculations is required and cannot be deleted, but it can be edited to maintain functionality.
Save & Preview
Save your changes and preview the screen to ensure the questionnaire looks and functions as expected.
If you close the browser or discard changes none of your changes will be applied. To avoid this, click "Save" and wait for a confirmation message. If the "Save" button is disabled, review all tabs and items for errors and address them.
