Scheduling appointments
User: Admin; Deployment Staff;
The Huma experience connects care teams and patients through the portal’s telemedicine functionality. Options include calling or messaging the patient from within the portal or scheduling appointments.
How it works
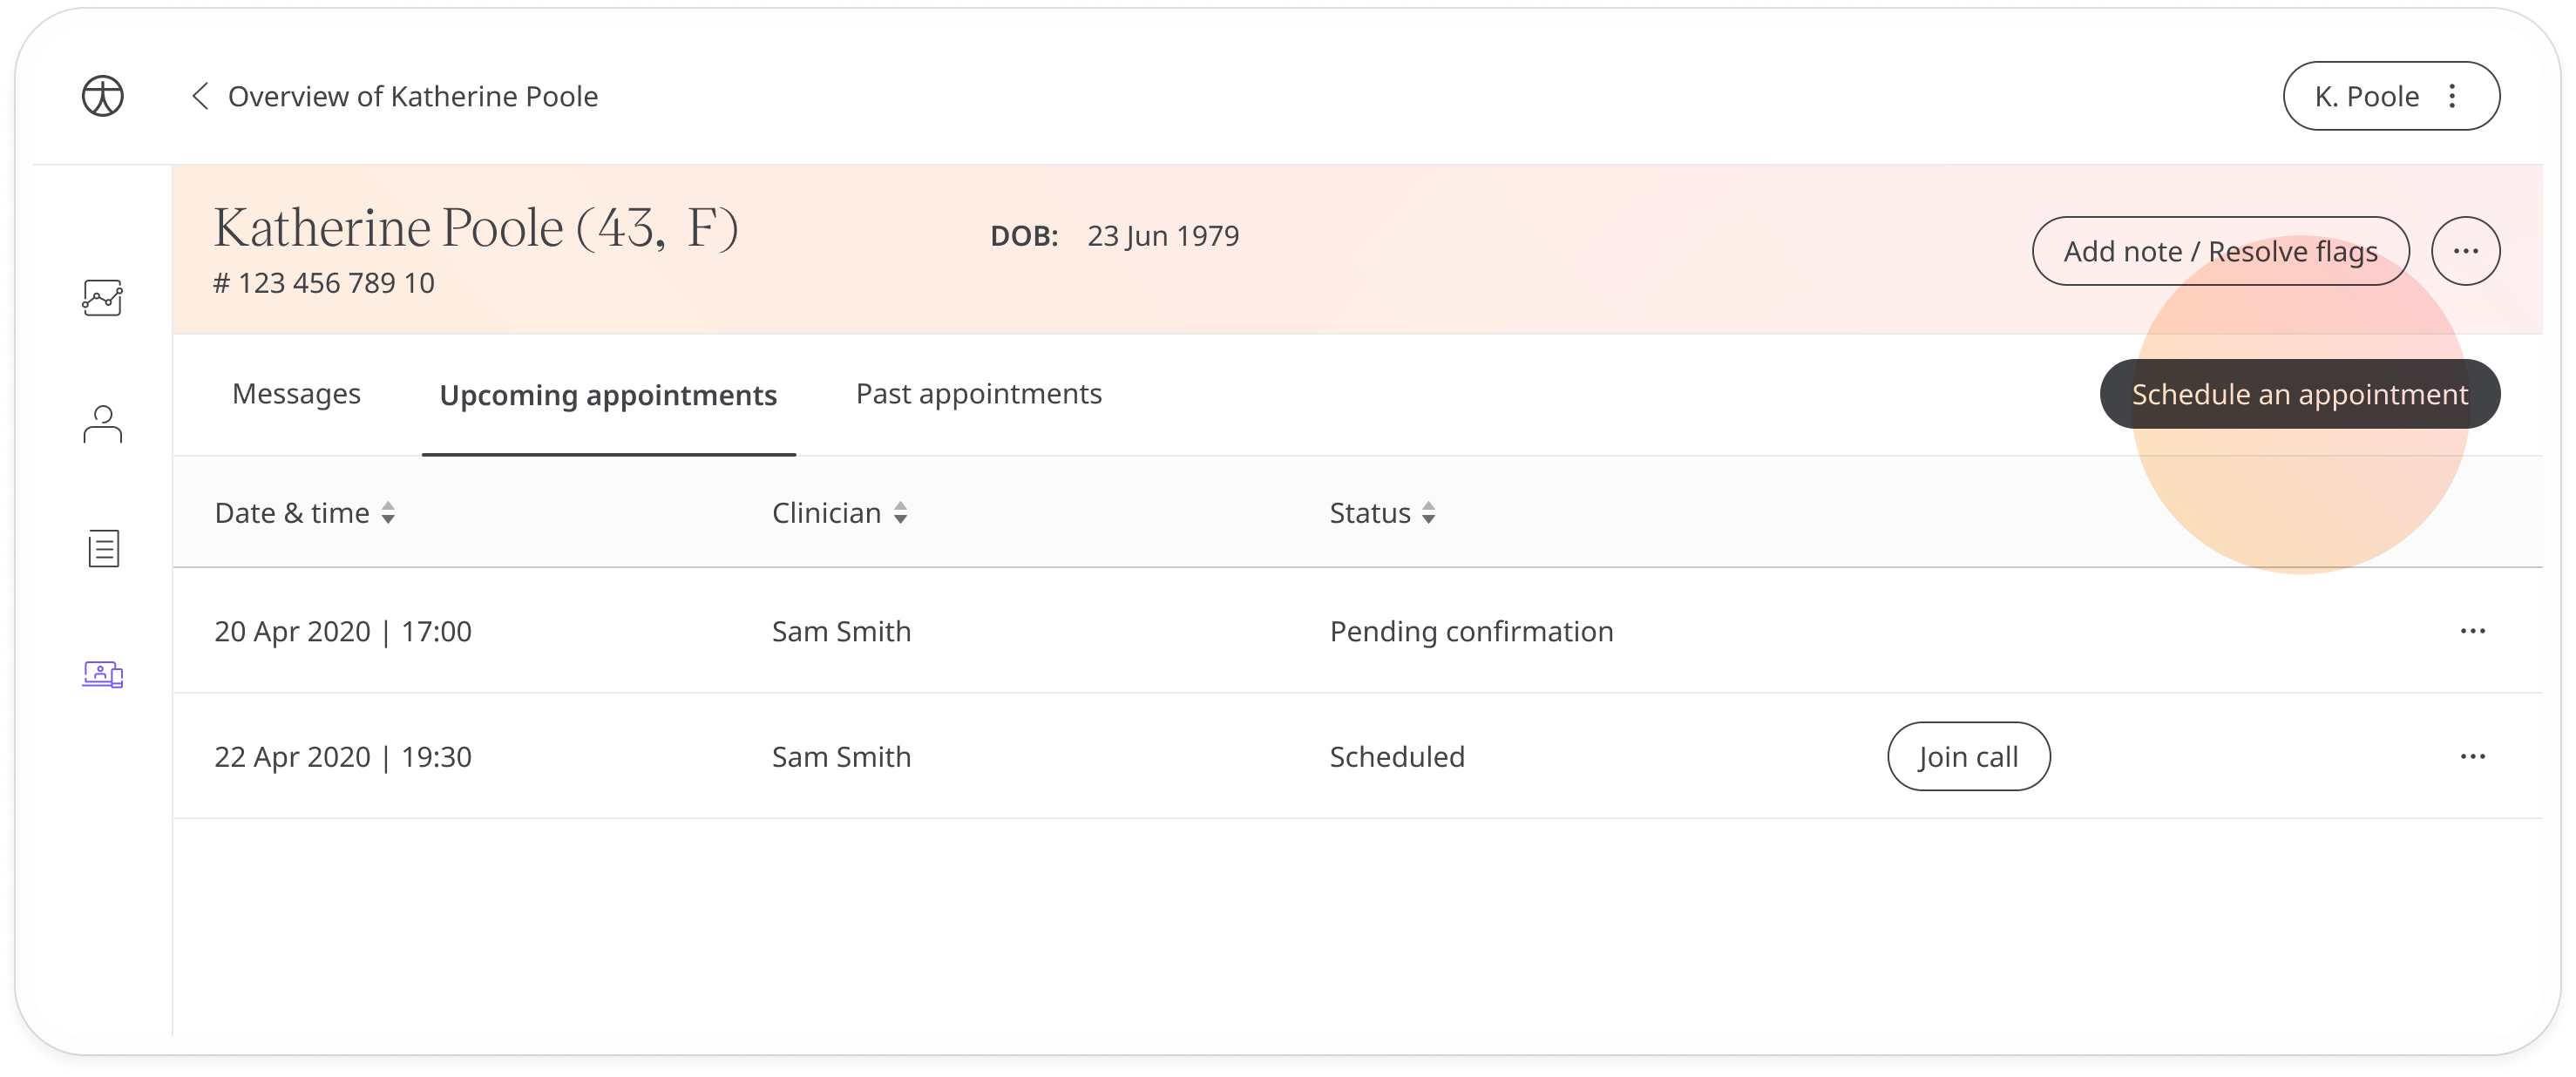
Scheduling an appointment in the Huma Portal is simple. From the Patient Dashboard, click the ![]() tab and select either Upcoming Appointments or Past Appointments. Next, click the Schedule an appointment button to open the scheduling window.
tab and select either Upcoming Appointments or Past Appointments. Next, click the Schedule an appointment button to open the scheduling window.
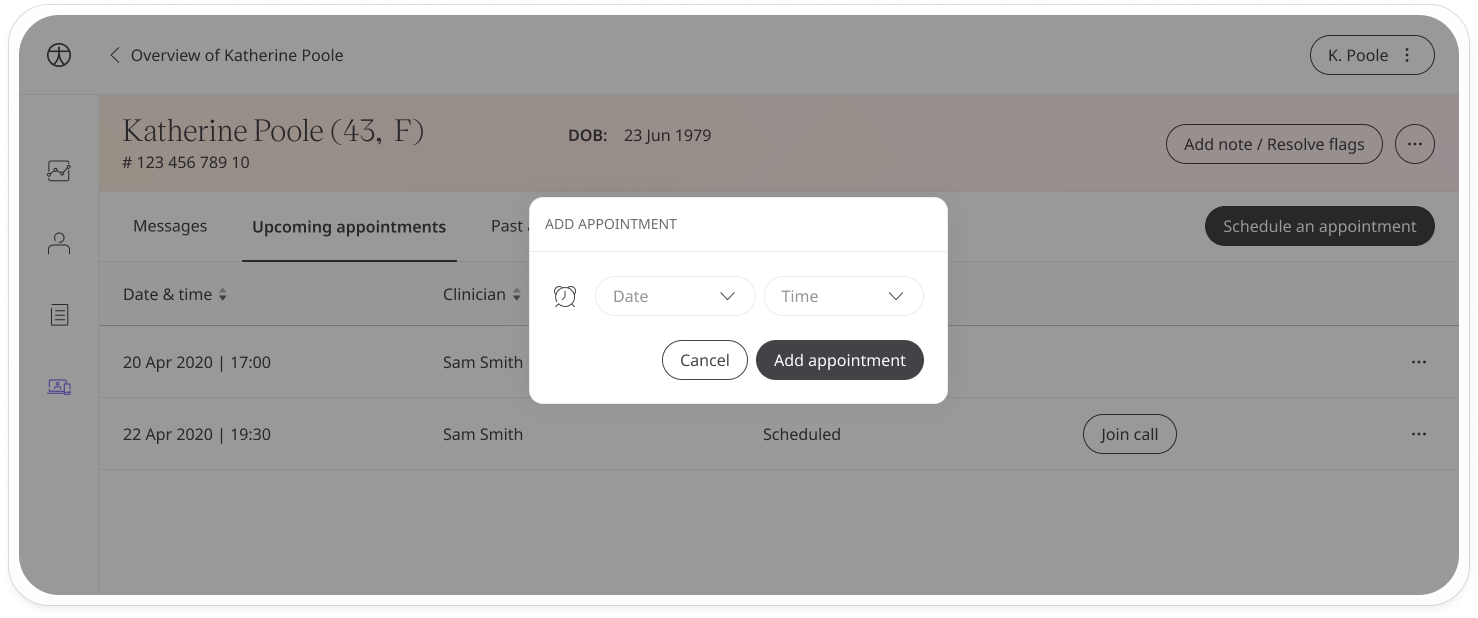
In the scheduling window, select a day and time then click Primary. A notification will be sent to the patient who will be able to accept or reject your appointment.
Appointments will show up in the Upcoming appointments tab with the status Pending confirmation until the patient has accepted it.
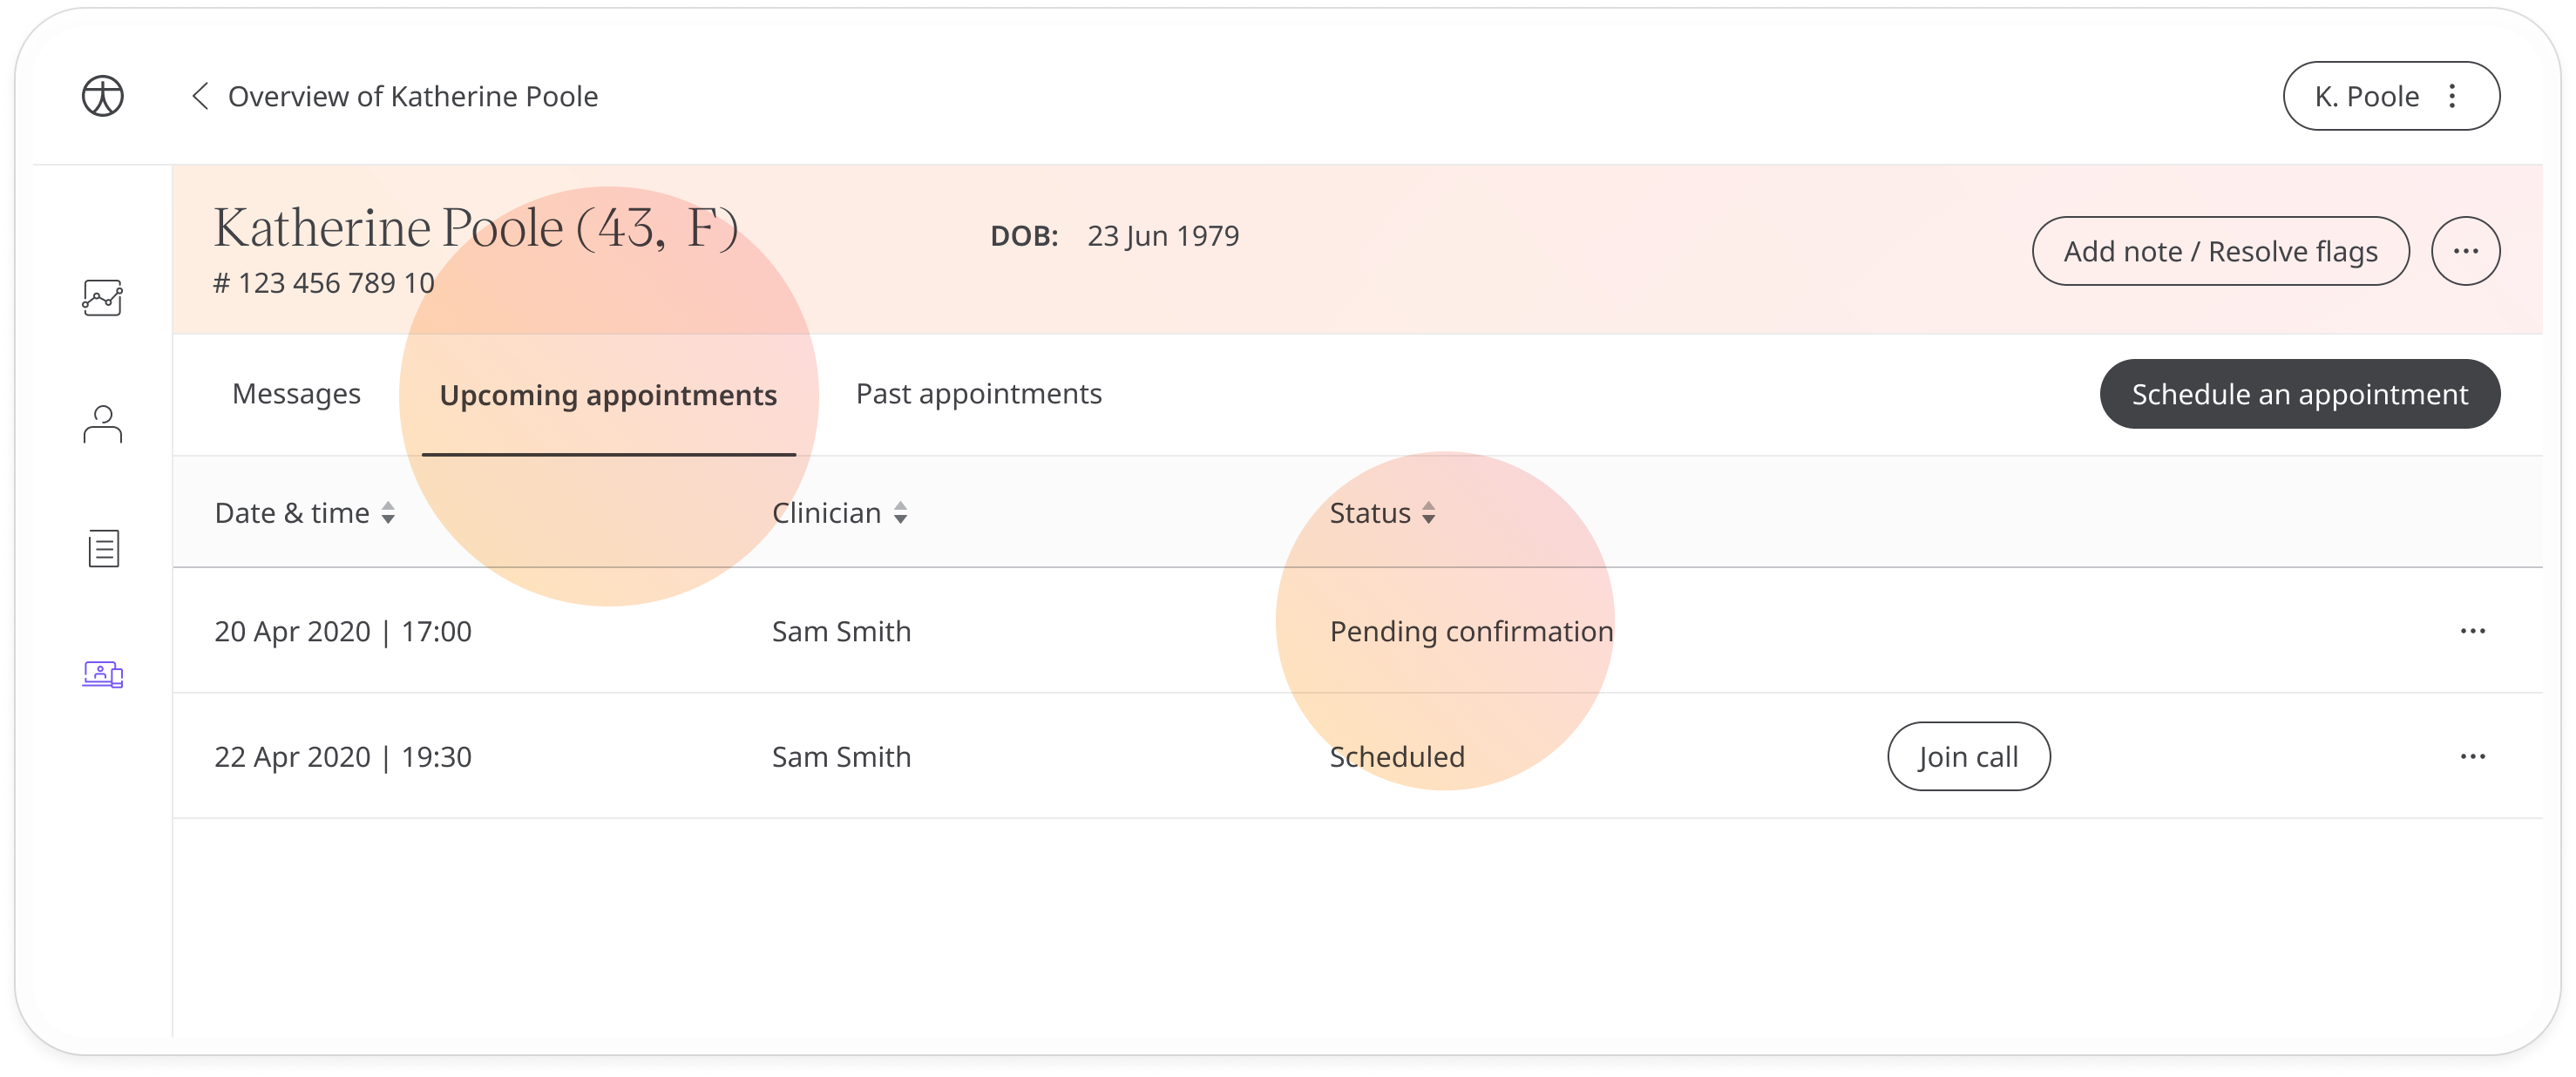
Once accepted, the status will change to Scheduled and you will see a Join call button. Use this button to call the patient any time before the scheduled appointment.
If you want to reschedule or delete the appointment, open the menu at the end of the row.
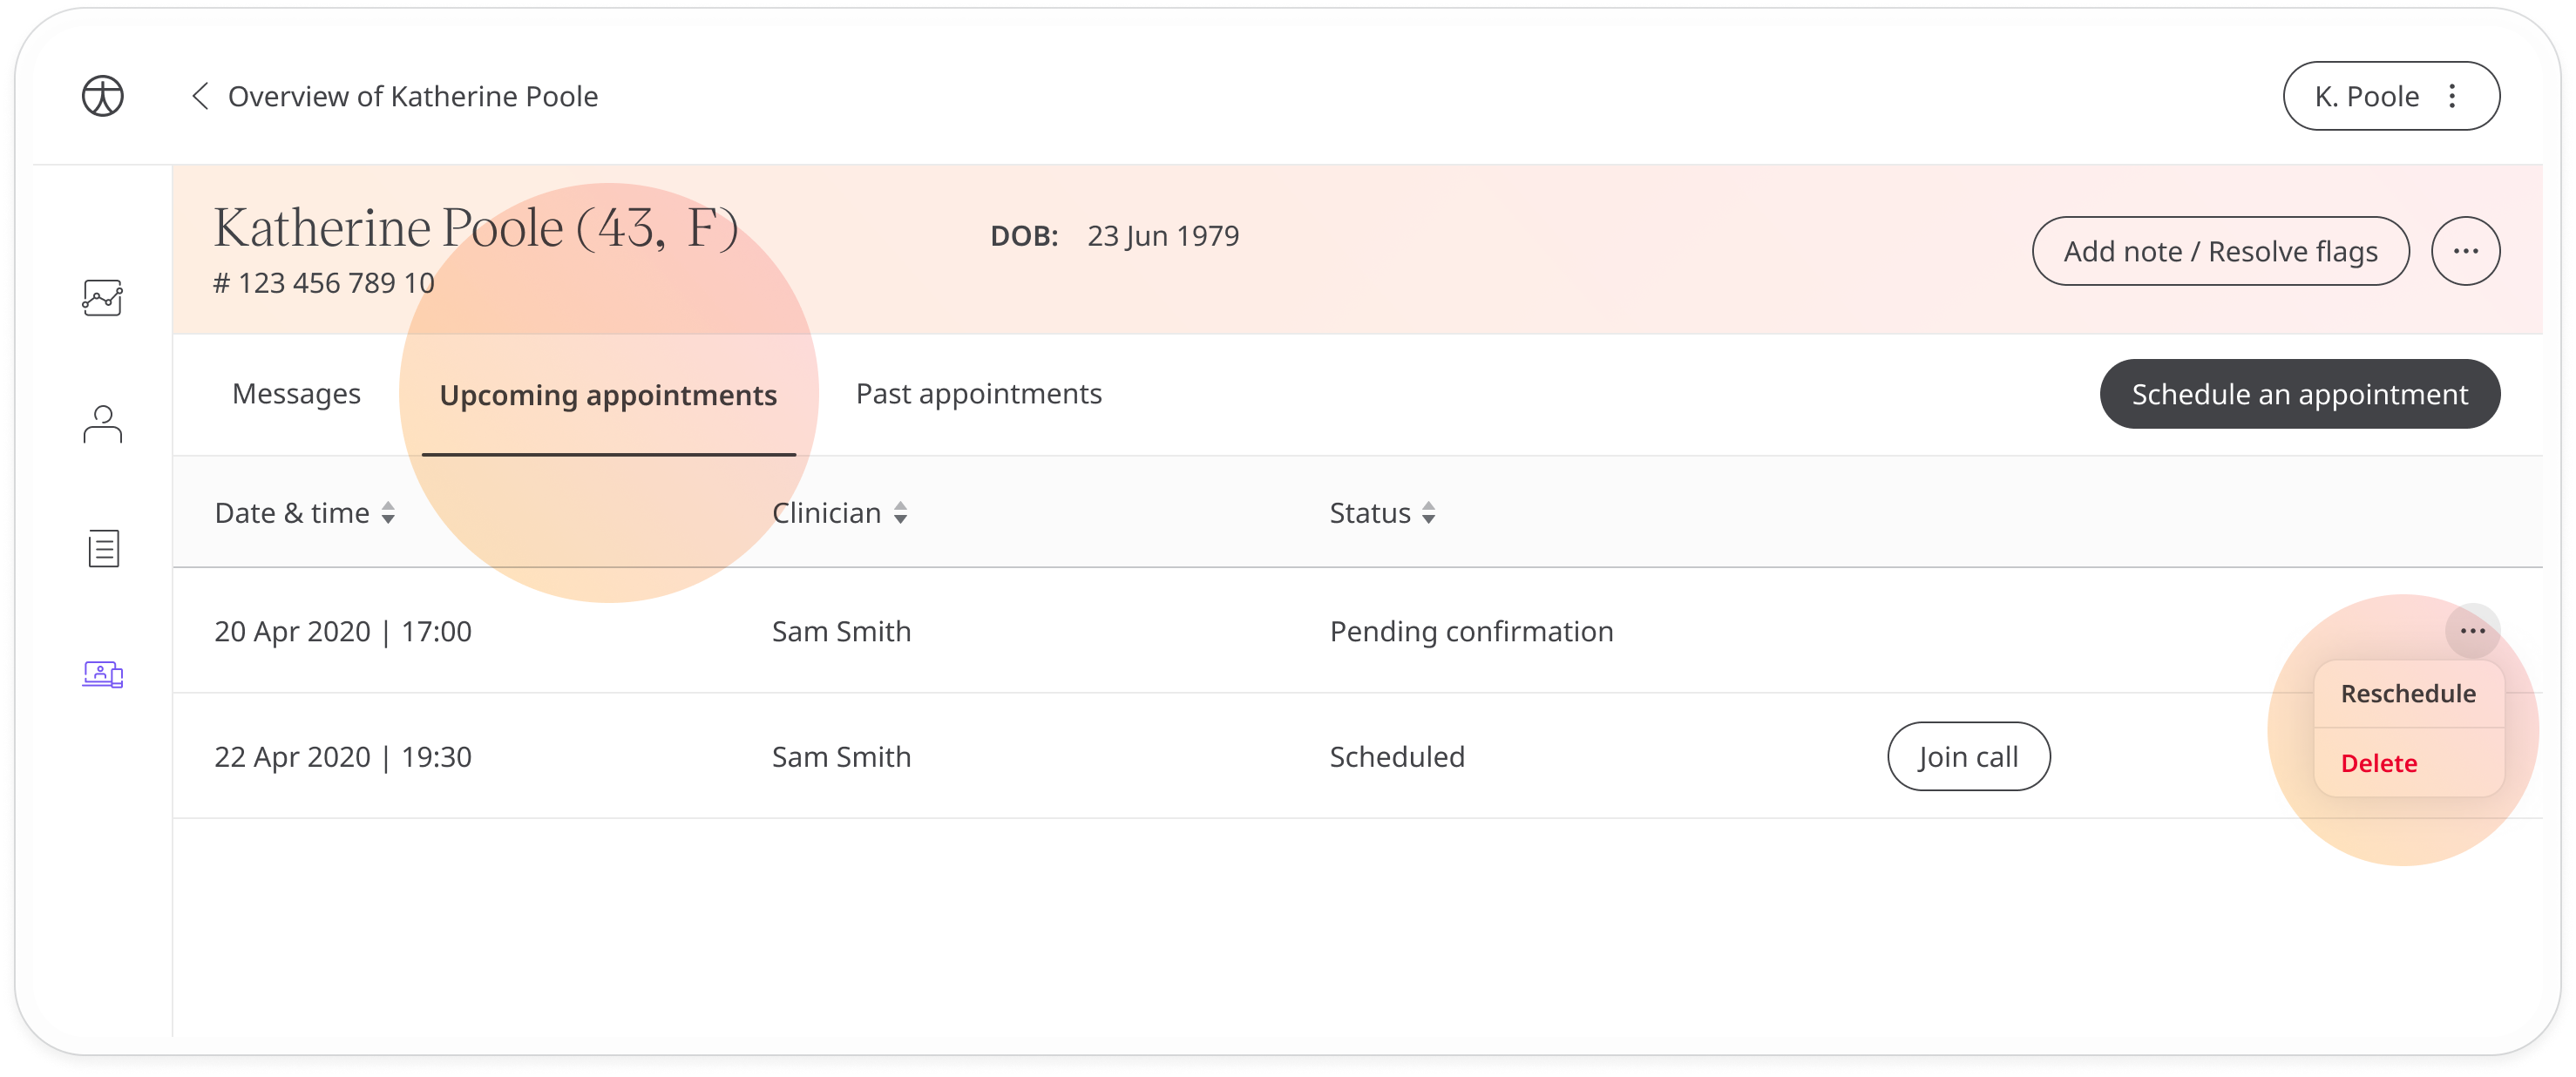
To reschedule, just select a new time and click Reschedule.

Related articles: Messaging patients; Calling patients;